VoIP (Voice-over-IP) Notification Feature

Note: Only the user with Admin or Superadmin access can follow this tutorial. If the options are not available on your Curogram app dashboard, please contact your practice administrator. Watch the video below for the tutorial:

00:00: In this guide, you will learn to navigate the VoIP Notification feature in Curogram. Follow the precise instructions for a seamless experience in utilizing this functionality. Do note that only those with Super Admin access can enable this feature. 00:16: VoIP Notification Feature enables the practice to receive a notification whenever a practice missed a call. 00:23: So let's go and enable this feature by following the steps. 00:27: On the Curogram App Dashboard, navigate to the settings tab. 00:31: Next, navigate to the Account Configurations tab and click the VoIP Notification option. 00:37: You should see this dashboard. 00:40: On the dashboard, navigate and click on the Authorize button. 00:44: You will be redirected to your ring central Account login page. Simply, login your ring central account. 00:51: Once logged in, it should look like this where options are enabled. 00:56: The highlighted option once enabled, you can send a message once you received a call that you missed from a patient. 01:02: Once the next highlighted option is enabled, you can send a message whenever you receive a voicemail. To enable, just simply toggle the icon option. 01:11: You also have the option to edit the message that you want to send to the patient if you miss a call or receive a voicemail from a patient. Simply, click the "View Template" options on the respective options. 01:23: A pop-up will appear. You may edit the message that you want to send for this feature. Also, you may utilize the variable legend for easier message template configuration. Once everything is set, click on save. 01:37: That's it. You've successfully enable the VoIP Notification feature in Curogram.

In this guide, you will learn to navigate the VoIP Notification feature in Curogram. Follow the precise instructions for a seamless experience in utilizing this functionality. Do note that only those with Super Admin access can enable this feature.

Go to app.curogram.com

1. VoIP notification feature

VoIP Notification Feature enables the practice to receive a notification whenever a practice missed a call.

VoIP notificatin feature

2. Let's start!

So, let's go and enable this feature by following the steps.

Let's start!

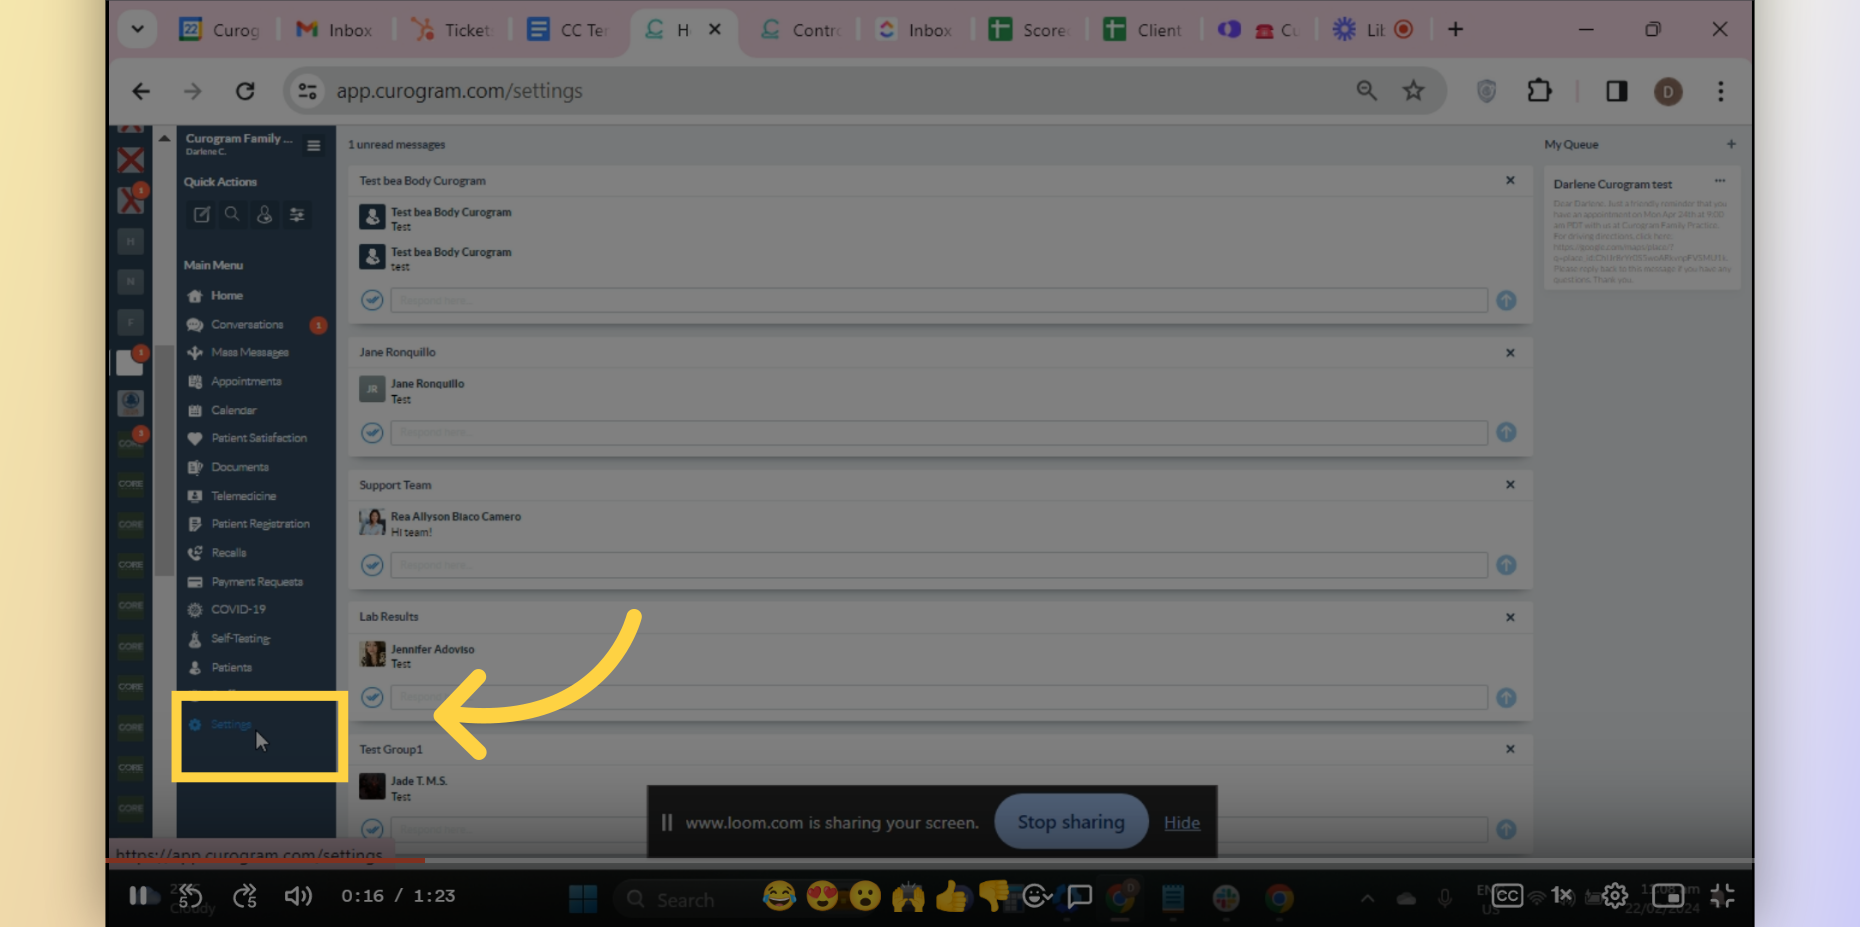
3. Click on Settings

On the Curogram App Dashboard, navigate to the settings tab.

Click on Settings

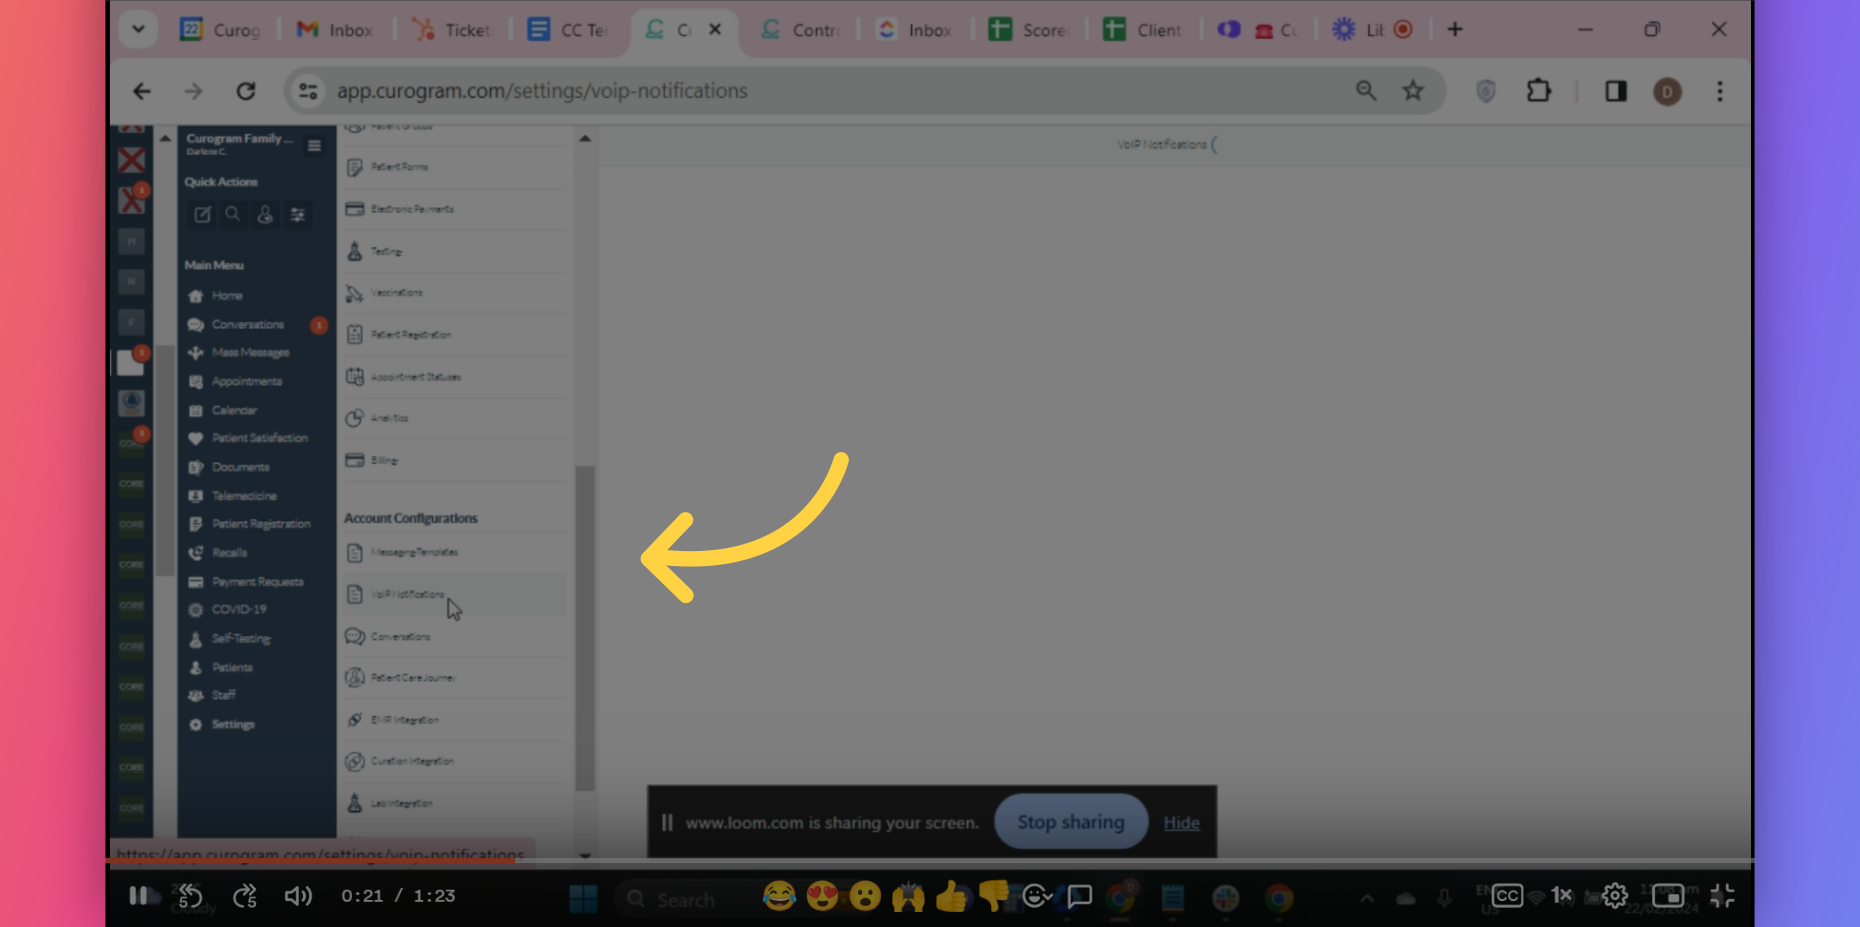
4. Click on VoIP Notification tab.

Next, navigate to the Account Configurations tab and click the VoIP Notification option.

Click on VoIP Notification tab.

5. You should see this Dashboard .

You should see this dashboard.

You should see this Dashboard .

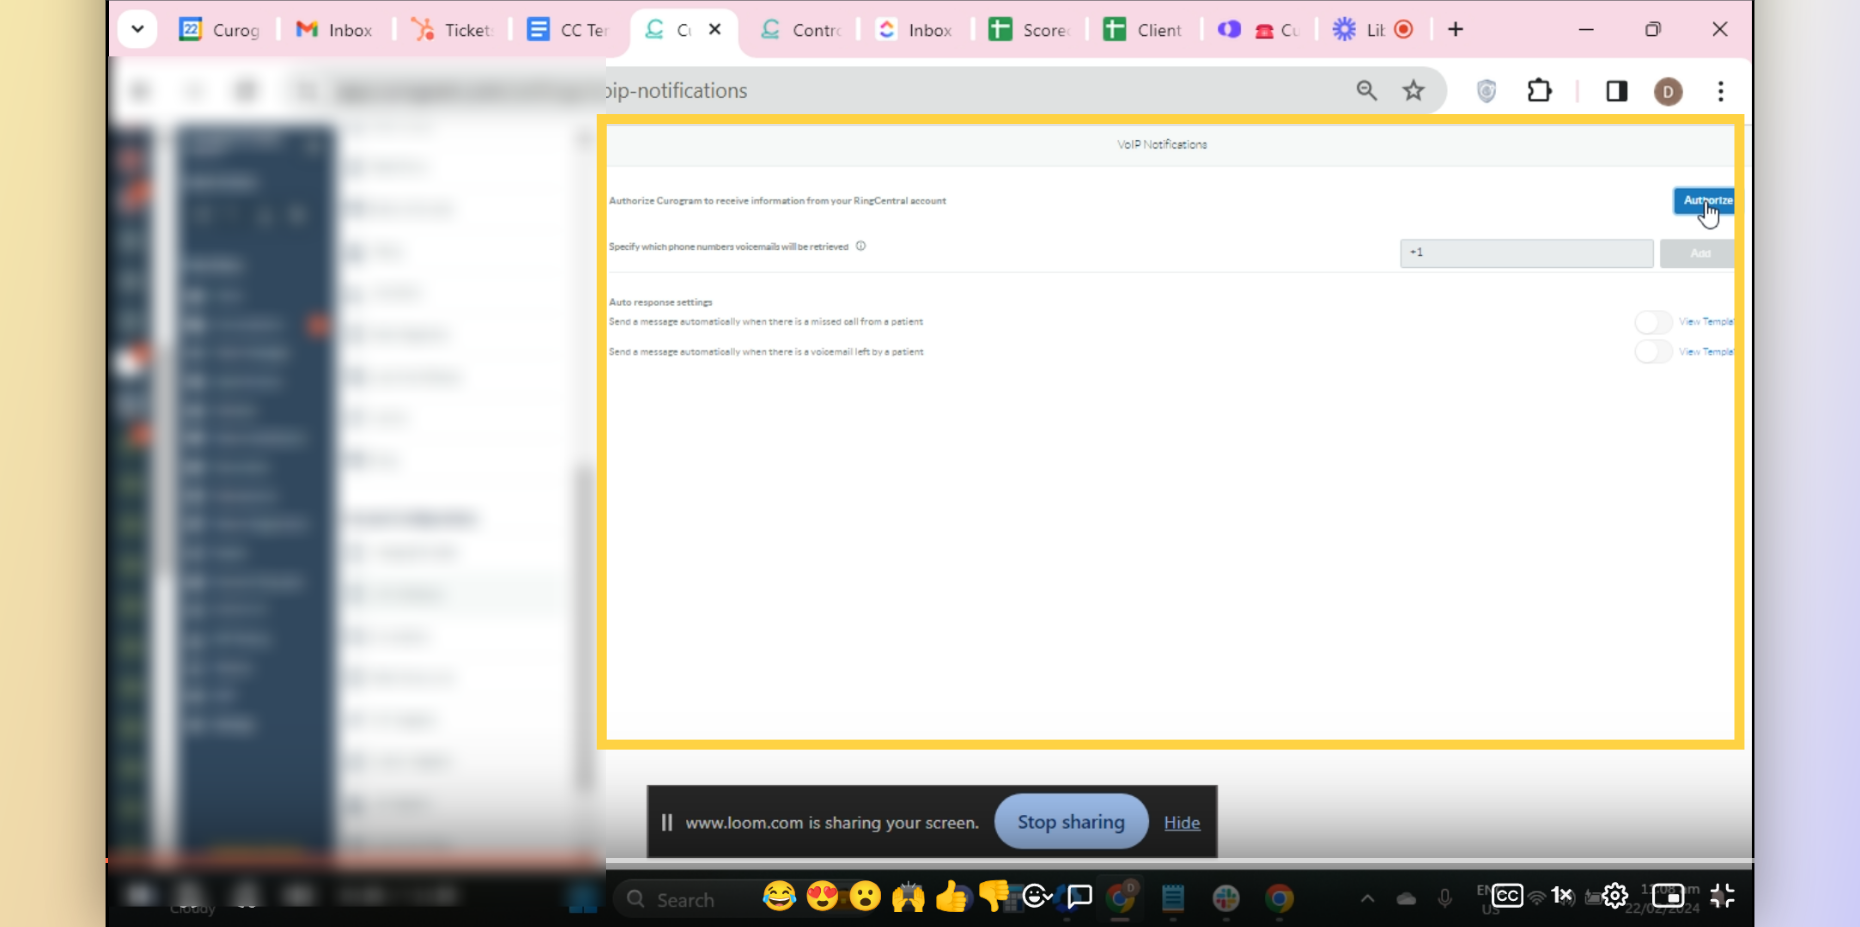
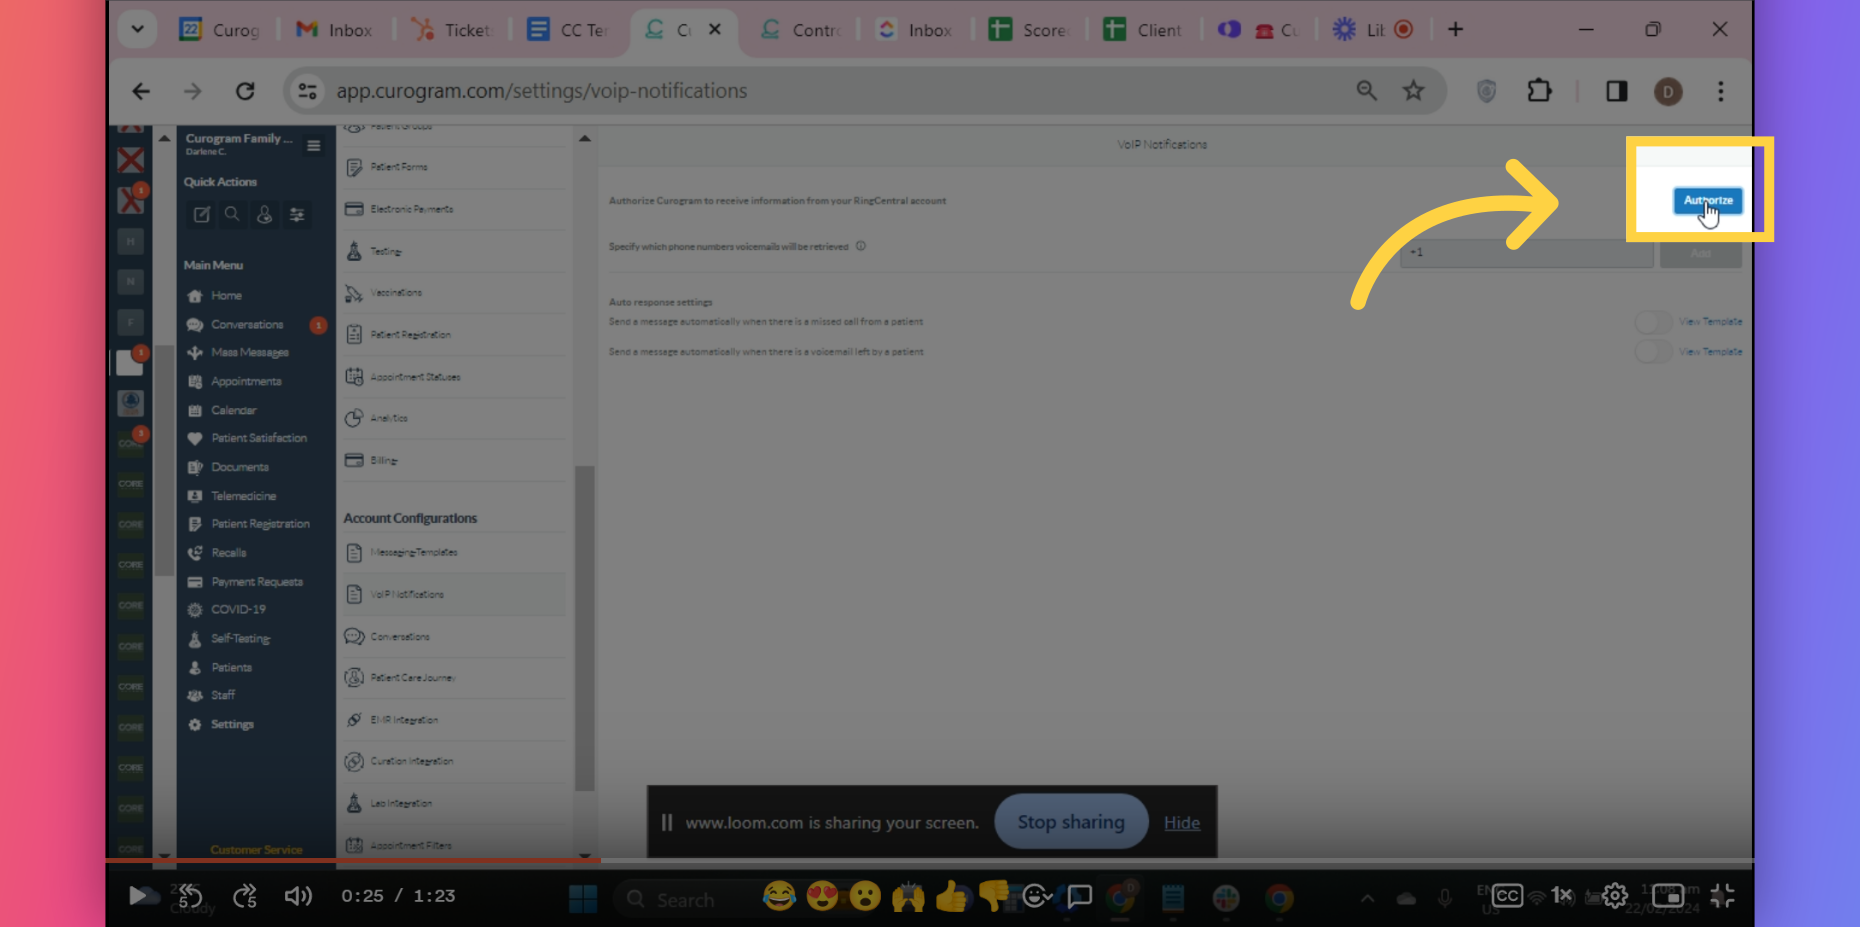
6. Click "Authorize" button.

On the dashboard, navigate and click on the Authorize button.

Click 'Authorize' button.

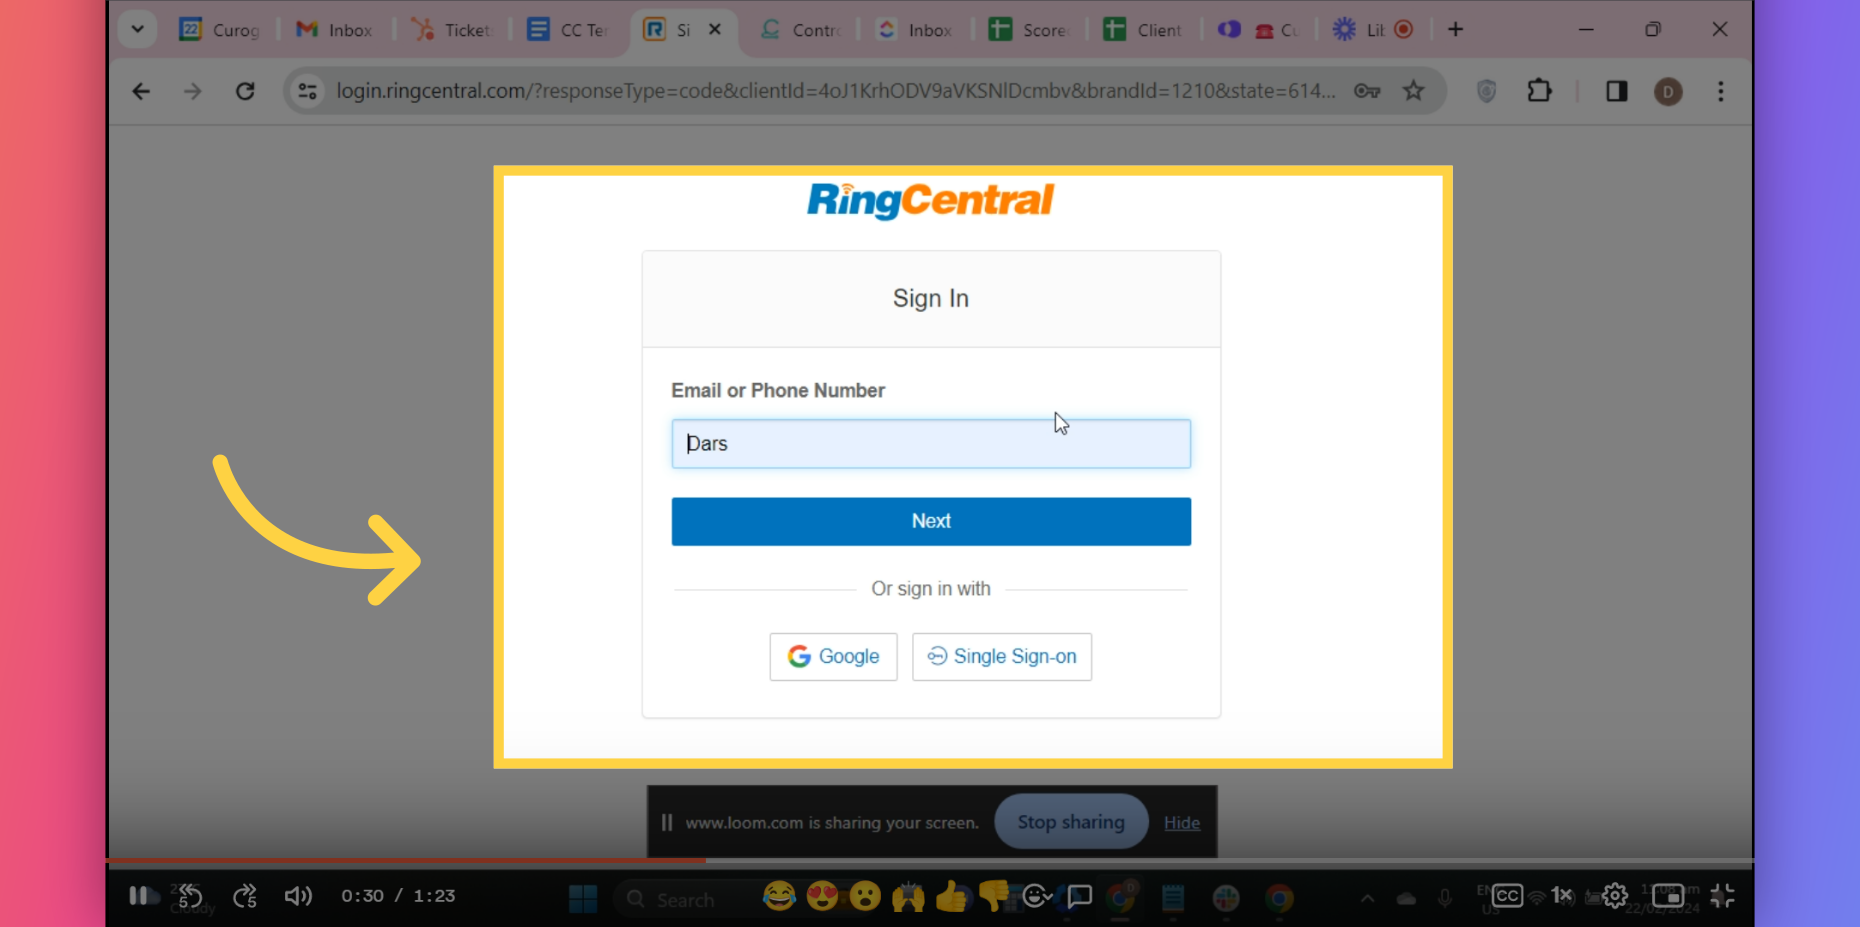
7. Login your Ring Central Account.

You will be redirected to your ring central Account login page. Simply, login your ring central account.

Login your Ring Central Account.

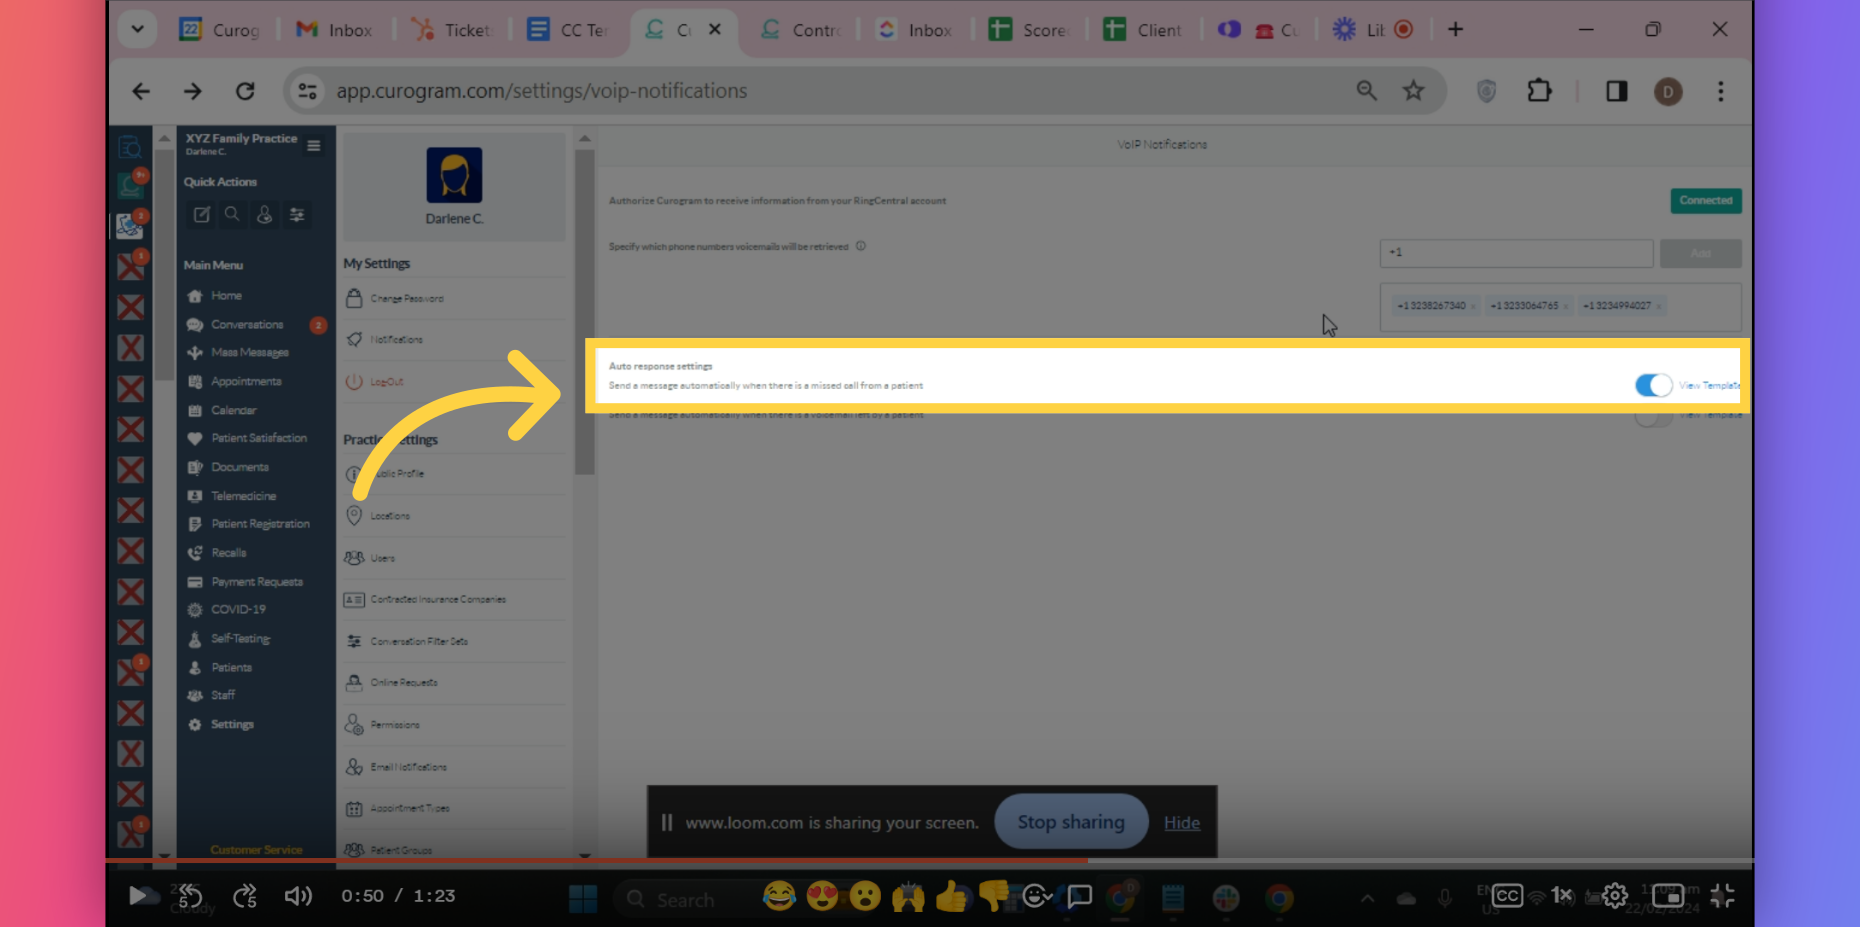
8. This is the dashboard that appears once you’ve logged in through the Ring Central and Curogram app.

Once logged in, it should look like this where options are enabled.

This is the dashboard that appears once you’ve logged in through the Ring Central and Curogram app.

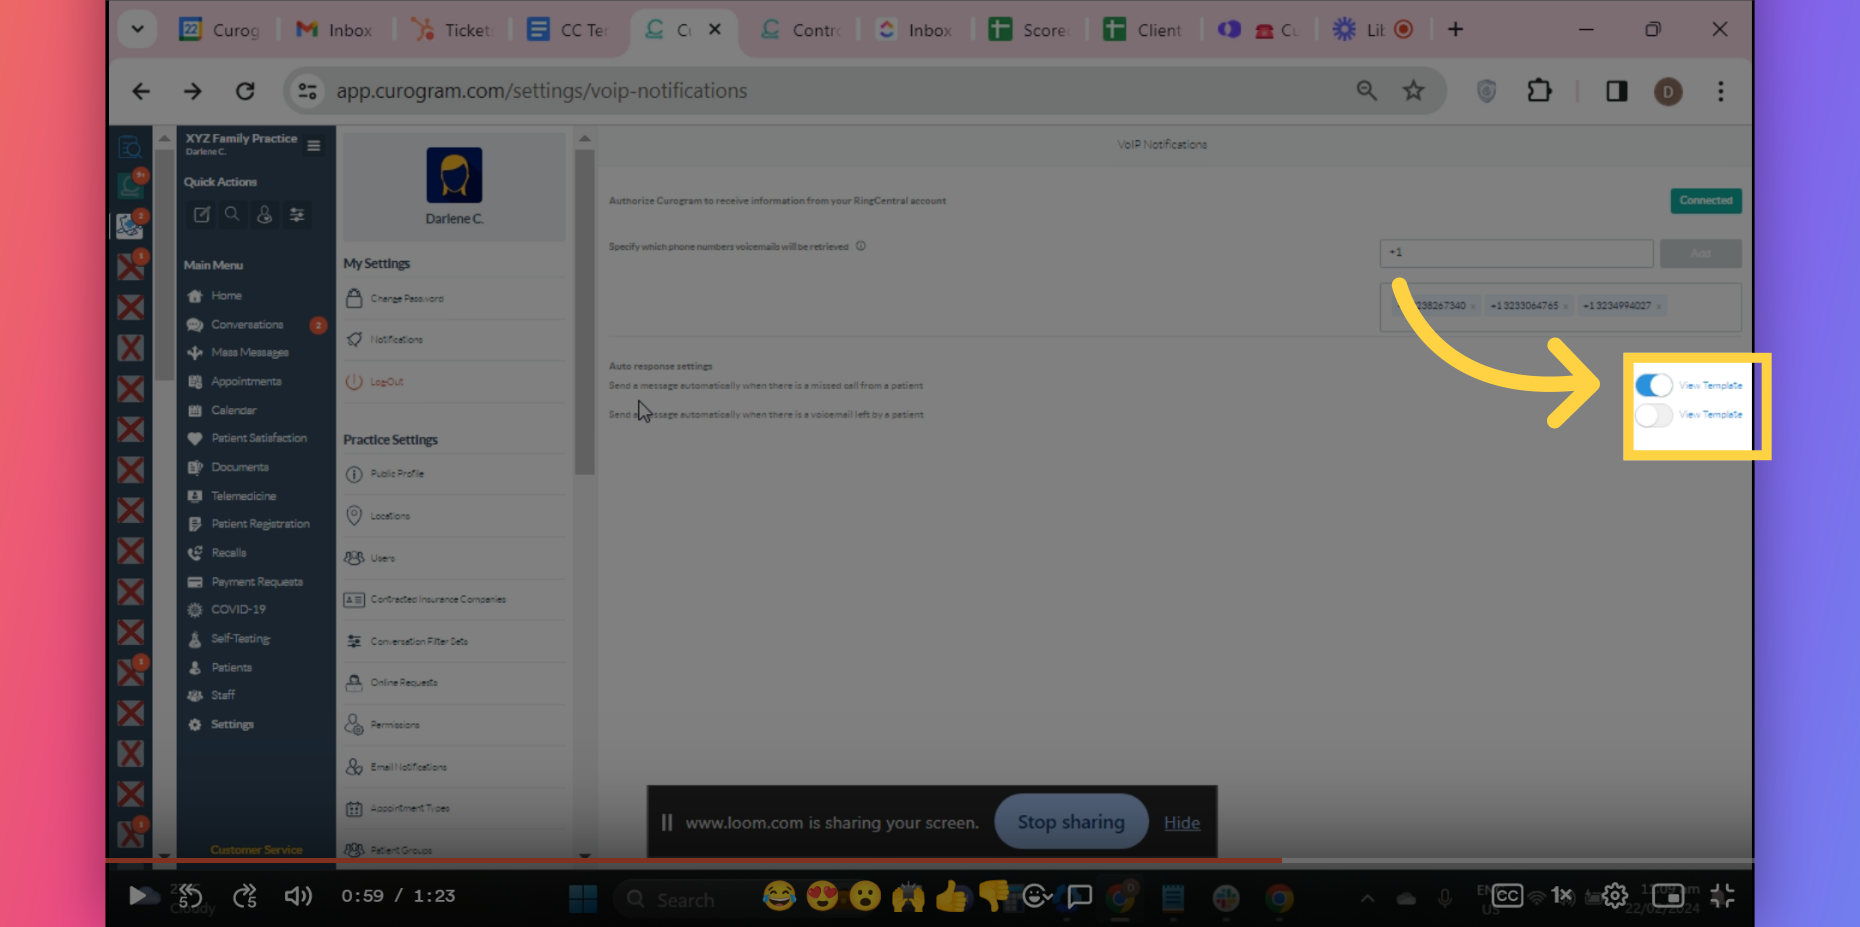
9. The first option.

The highlighted option once enabled, you can send a message once you received a call that you missed from a patient.

The first option.

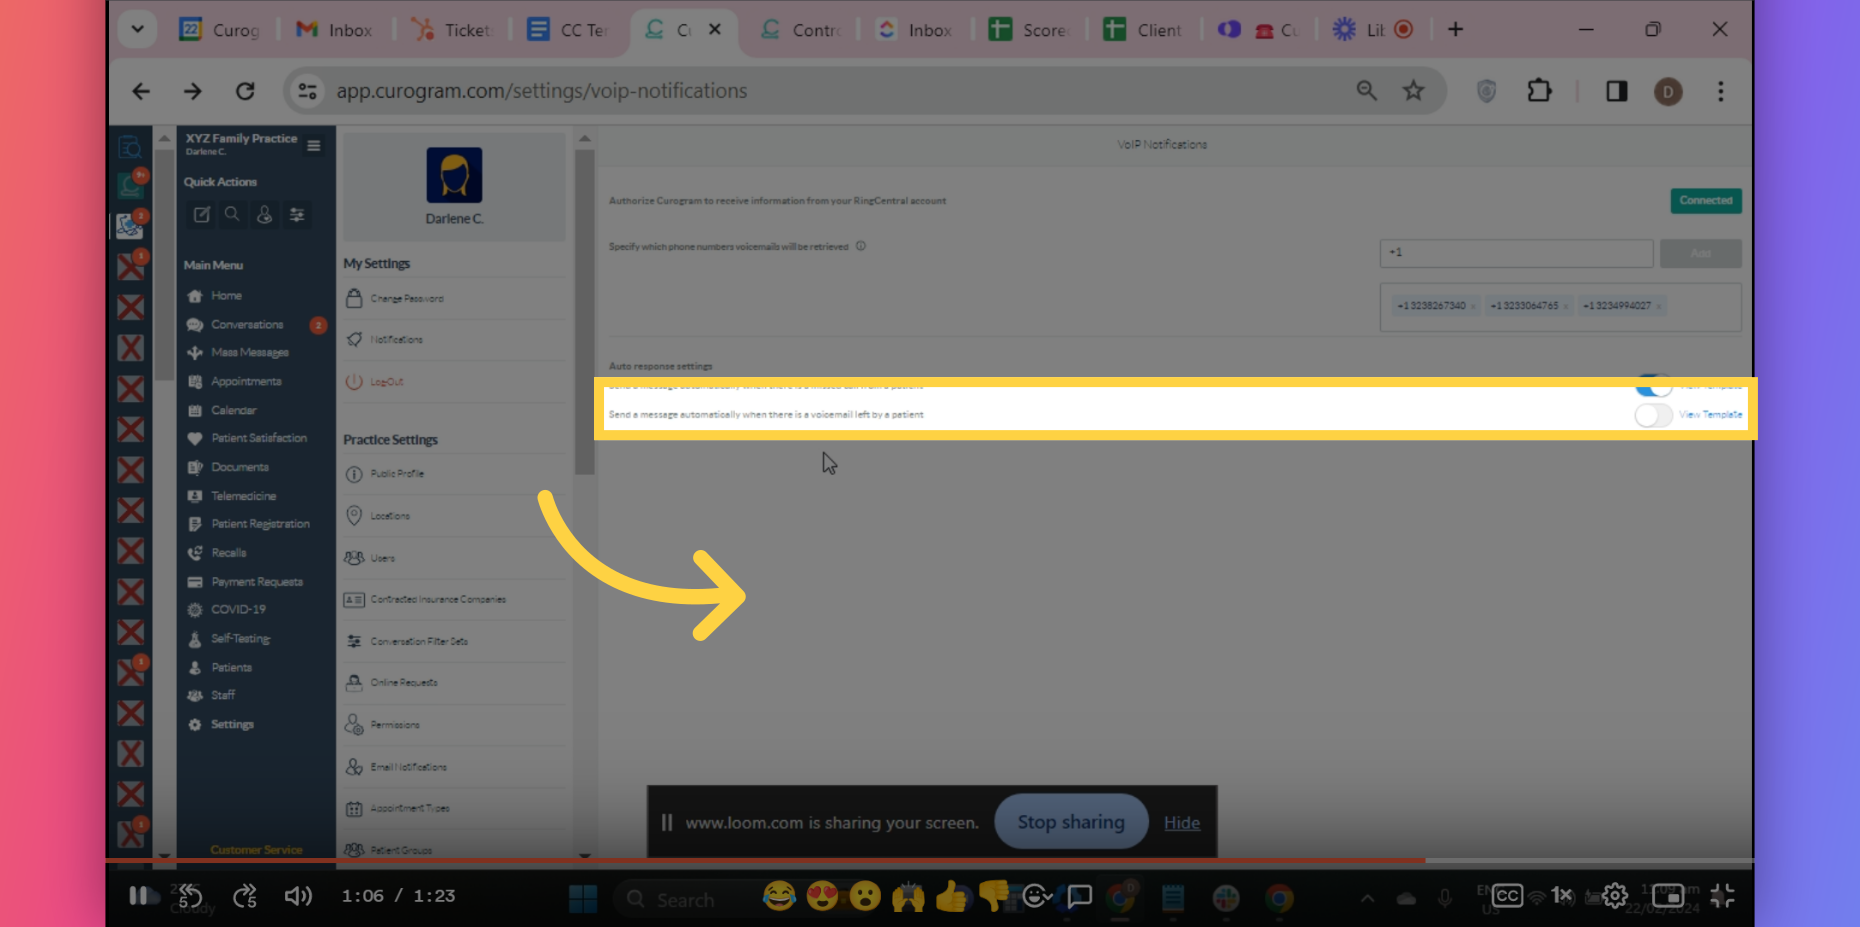
10. The second option.

Once the next highlighted option is enabled, you can send a message whenever you receive a voicemail. To enable, just simply toggle the icon option.

The second option.

11. View and Edit Message template.

You also have the option to edit the message that you want to send to the patient if you miss a call or receive a voicemail from a patient. Simply, click the “View Template” options on the respective options.

View and Edit Message template.

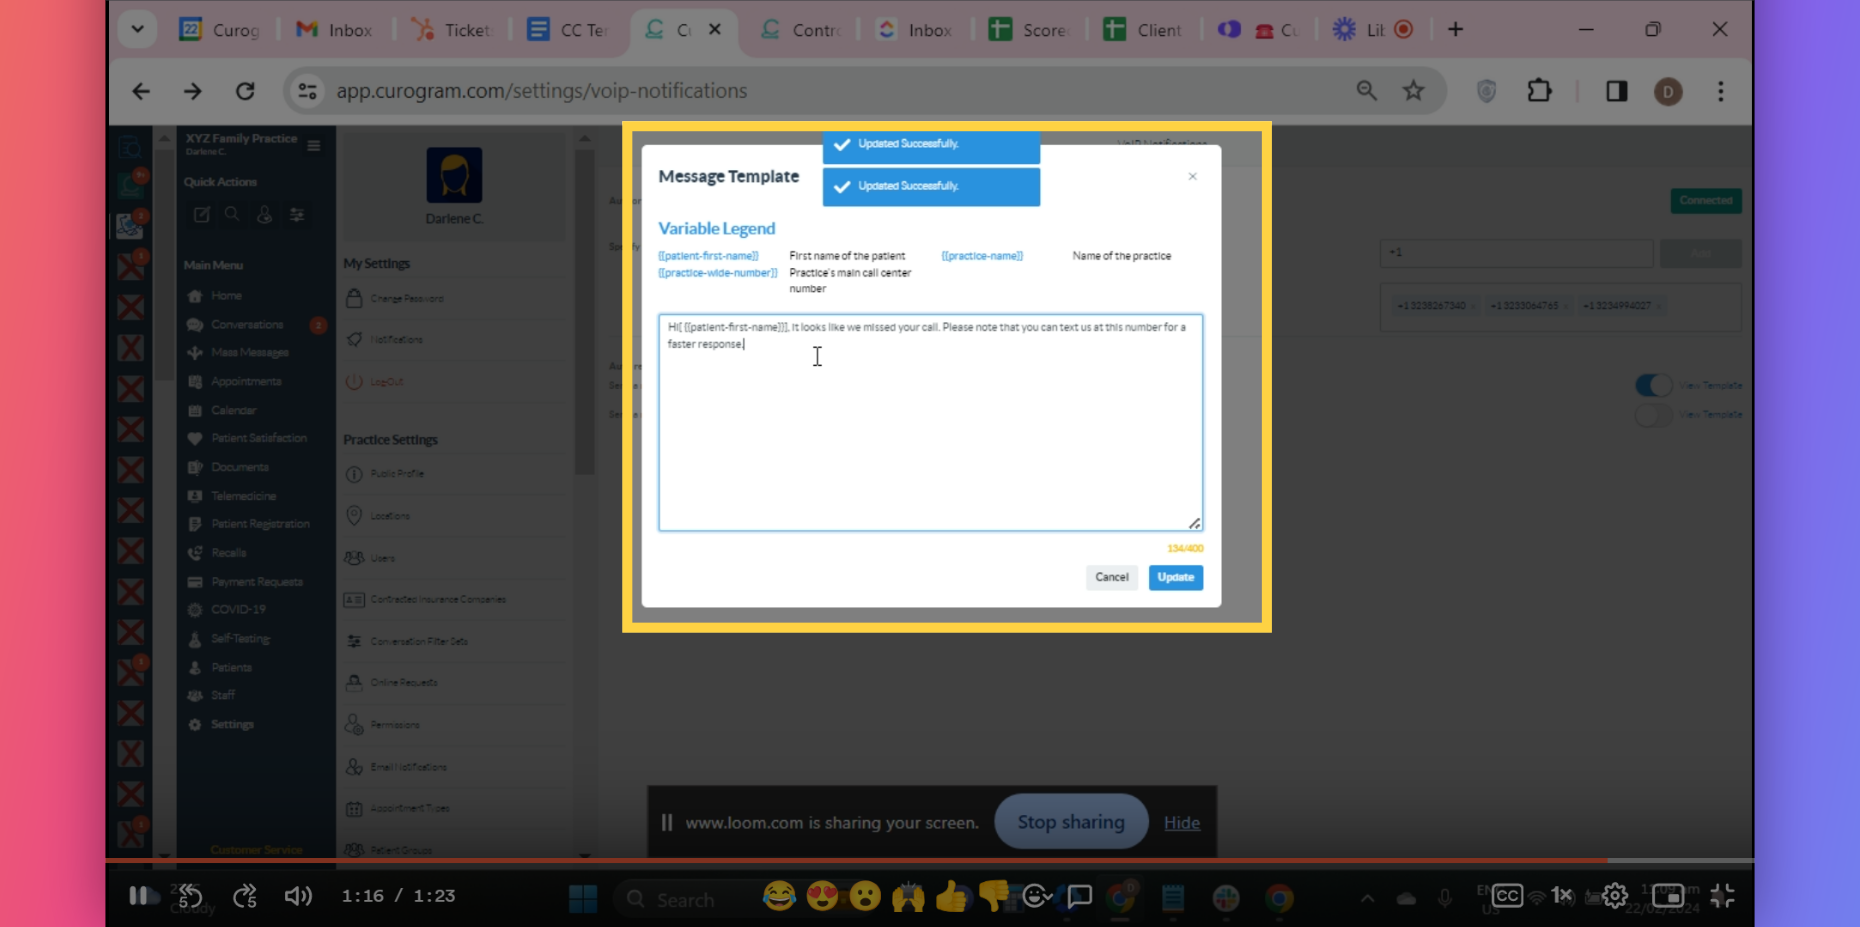
12. Edit Template with Variable Legends.

A pop-up will appear. You may edit the message that you want to send for this feature. Also, you may utilize the variable legend for easier message template configuration. Once everything is set, click on save.
Edit Template with Variable Legends.
That's it. You've successfully enable the VoIP Notification feature in Curogram.