
Go to curogram.com
1. Navigate to Settings > Patient Form Statuses
To access the patient form statuses on your Curogram App dashboard, navigate to the settings section.
Please note that this option is exclusively available to practice administrators. If you do not see this option, we recommend reaching out to your practice admin for assistance. Alternatively, you can always contact our customer support team for help.

2. These are the default patient form statuses.
By default, you can view only two statuses for patient forms, "Unread" and "Reviewed". The "Unread" status is essential and cannot be deleted as it plays a crucial role in tracking patient form submissions.

3. Adding Patient Forms Status
We are excited to introduce a new feature that allows you to customize the statuses of patient forms. Let's dive into the process of adding these customized statuses.

4. Add Button
Locate the add button and click on it.
 5. Input the name and click Create.
Next, enter the name and click create. You will then see a confirmation that the new patient forms status has been successfully created.
 6. Customizing Colors
You can now also personalize the colors for both existing and newly added patient form statuses. Here's how to get started.
 7. Color icon
Locate the color icon and click on it.
 8. Color icon
Feel free to select any color of your choice. Once you've made your selection, simply click on the update button.

9. Renaming Patient Forms Statuses
You have the option to rename the statuses of patient forms. Follow these simple steps to customize them.

10. Pencil Icon
Click the pencil icon located next to the color icon.

11. Edit the name and click Update.
Enter the new name in the field provided and click update to apply the changes.
 12. Deleting Patient Forms Statuses
Next, let's walk through the process of deleting patient form statuses following these simple steps.

13. Trash Icon
Next, locate the trash icon located next to the pencil icon and click on it.
 14. Confirm removal
To confirm the removal of the patient form status, simply click the "Yes" button.
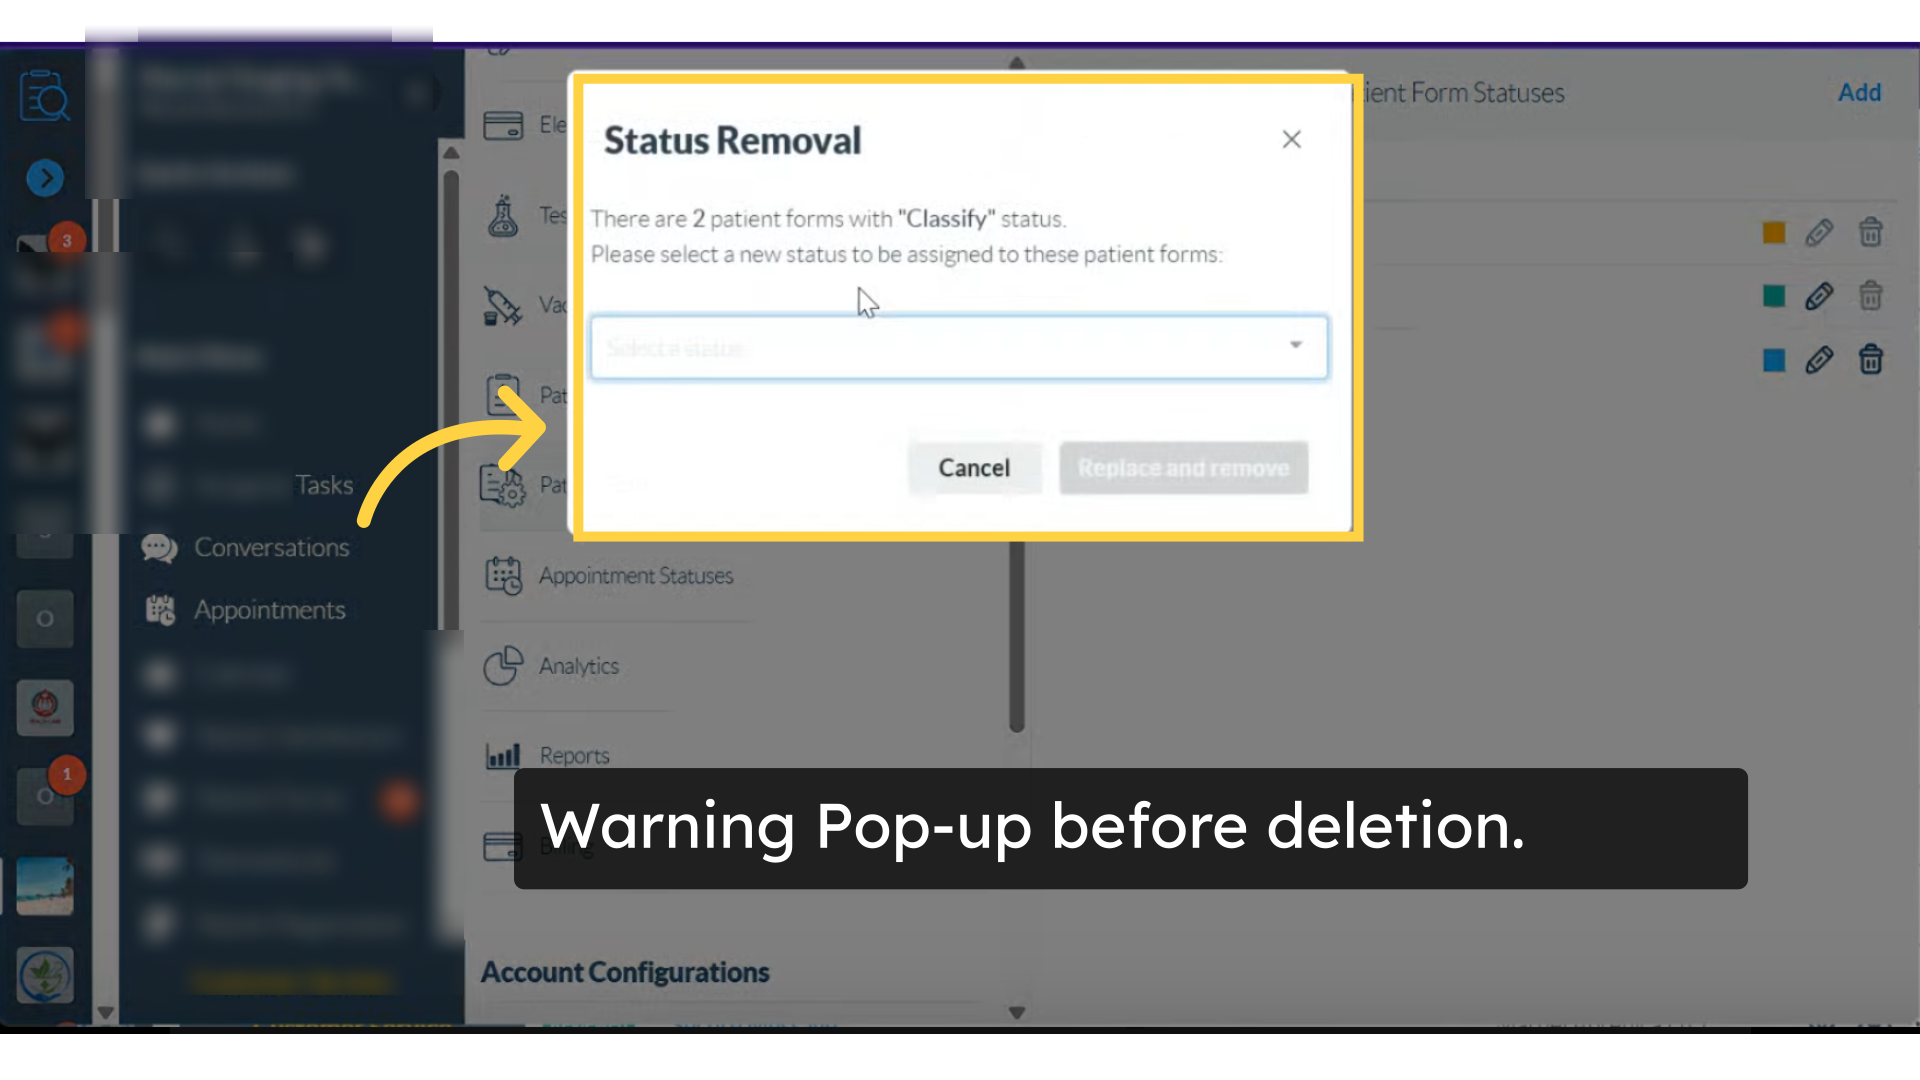
 15. Warning Pop-up before deletion.
If the patient form status you are attempting to delete has any associated patient forms. A warning will appear to notify you before the deletion proceeds. If you still wish to delete the patient forms status, go back to the patient forms tab filter by that status and you may choose to change the existing patient forms associated with a status before proceeding to delete the patient form status.
 That's it. This guide outlines the steps for managing patient form, statuses, including how to change their status, customize color options, rename and delete these statuses among other functionalities.
Updated as of May 20, 2025 (based on Release 1.277)