
If you’re already using Curogram and you’re curious about trying out the mass messaging feature, here’s how to begin.
Go to app.curogram.com
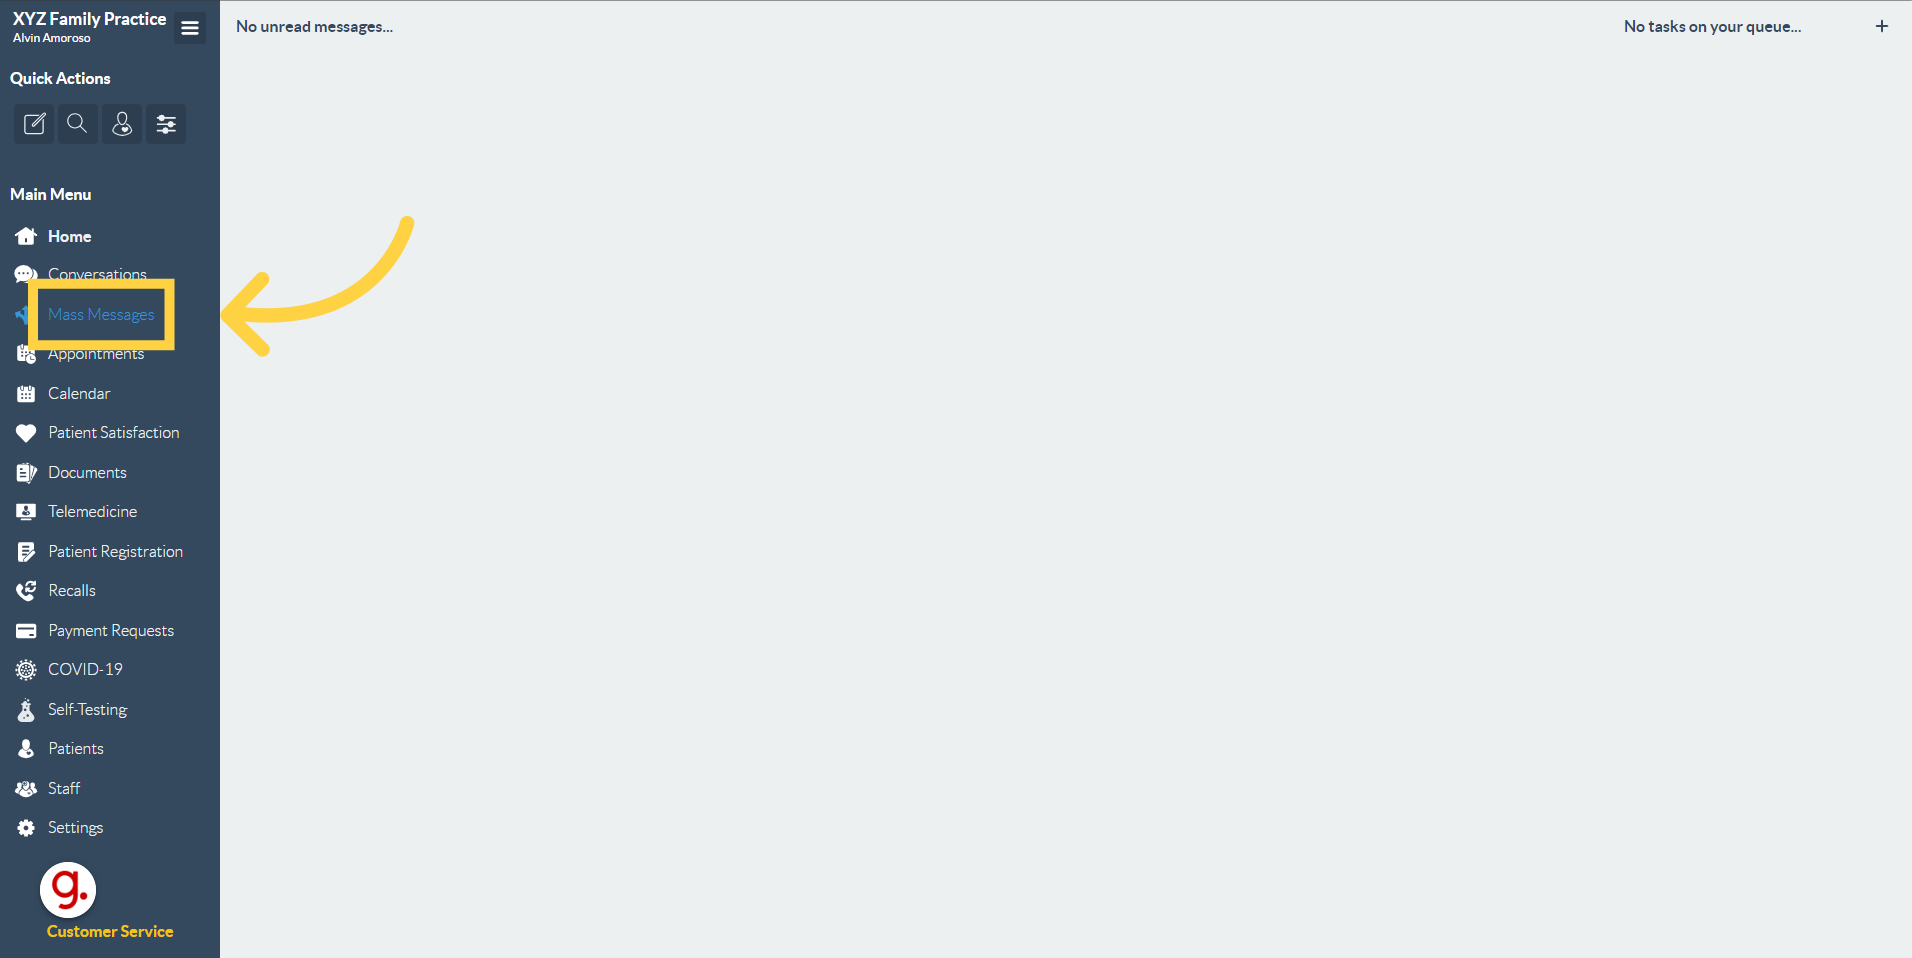
1. Click "Mass Messages"
Log in to your account to access your dashboard. Under the Main Menu, select Mass Messages.
 2. Newly-updated Steps
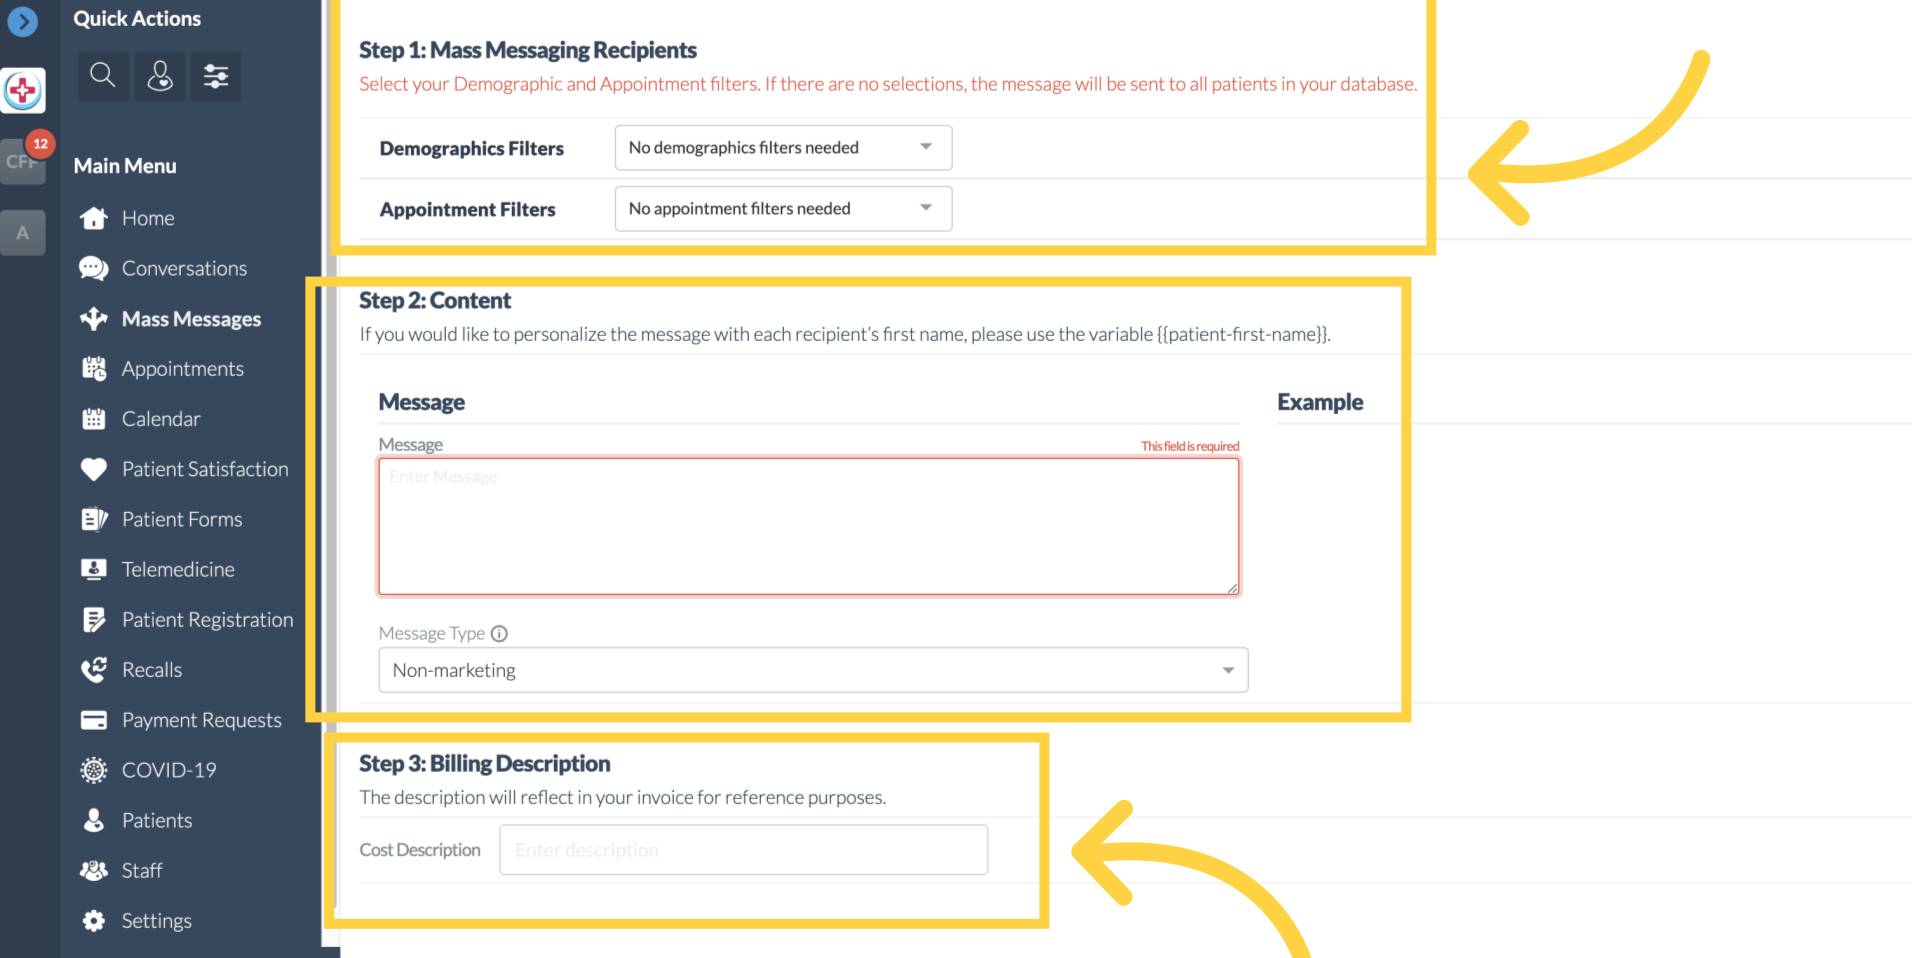
The mass message layout is now divided into three step and sections for easier navigation: Step 1: Select filters. Step 2: Compose the message. Step 3: Billing or cost description.
 3. Step 1: Mass Messaging Recipients
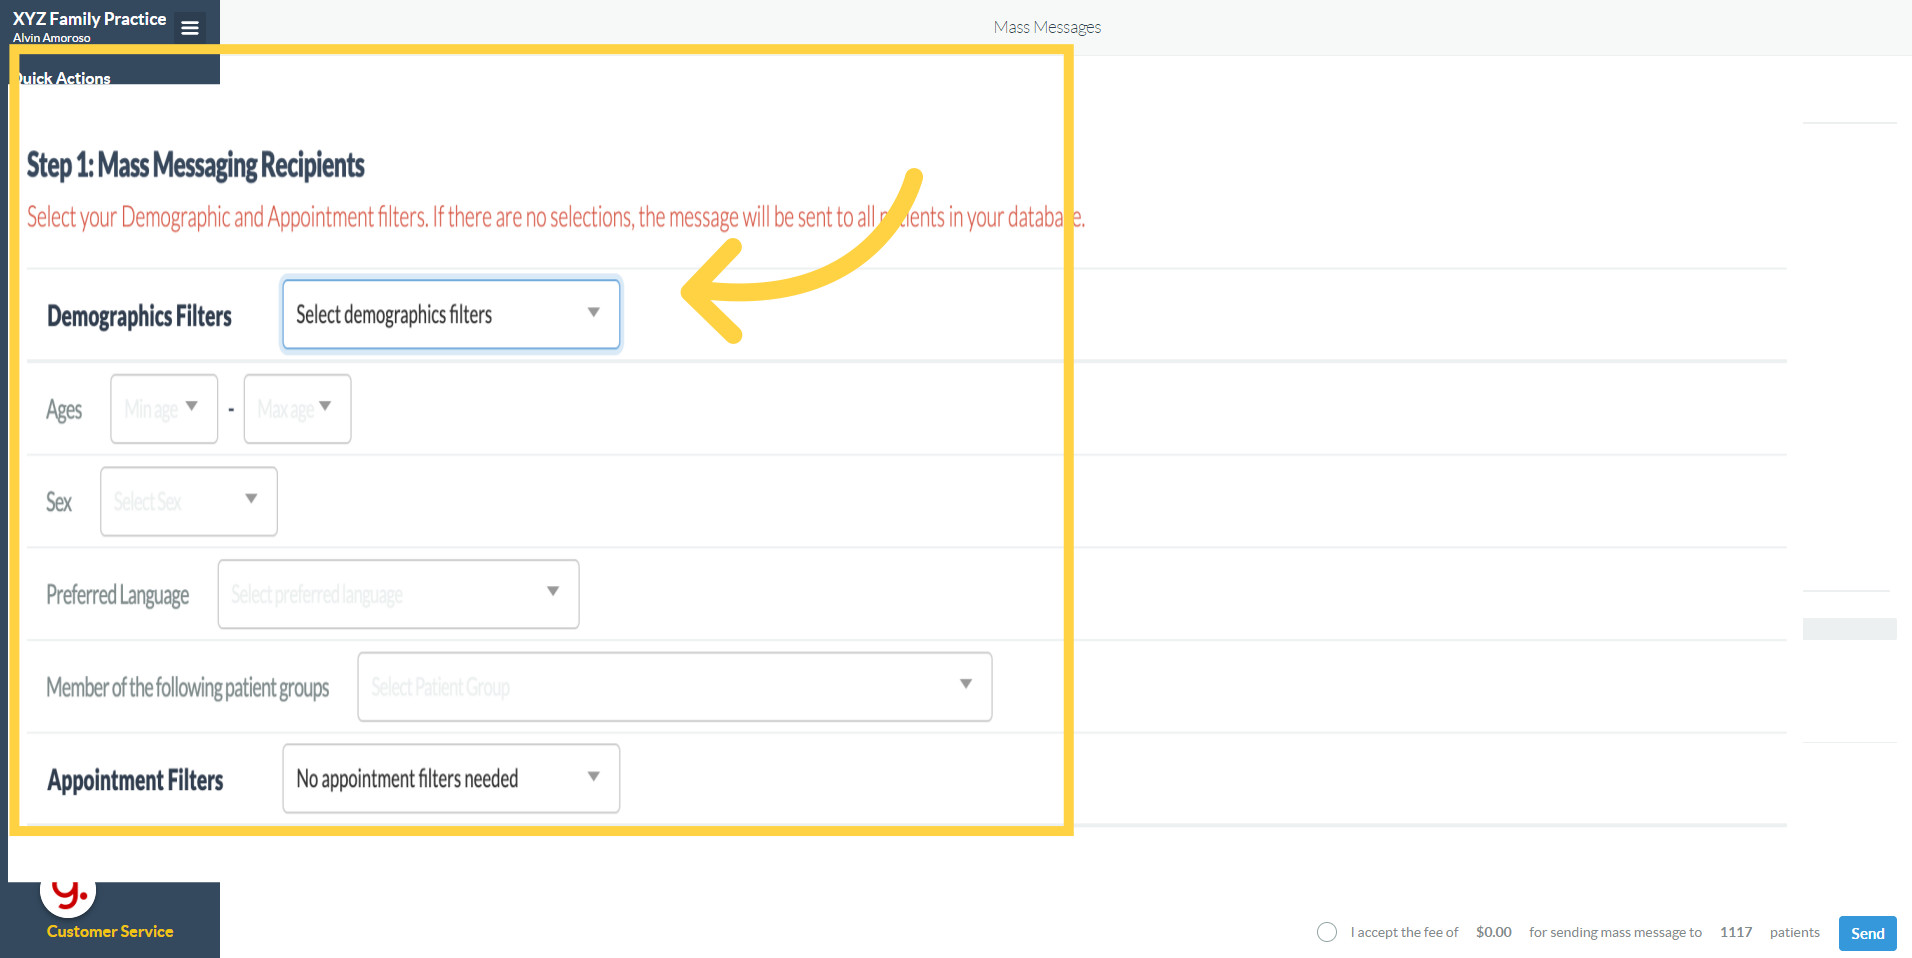
In Step 1, you'll be selecting filters, which are now bundled into two categories: Demographics and Appointments. The Demographics filters include options like age bracket, sex, and a new preferred language field that reflects the language set in the patient's records.
 4. Appointment Filters
Next, the Appointments filters allow you to sort by appointment type, status, time range, date range and location. If no filters are selected, the system will automatically send the message to all patients in the database. For example, to target a specific group, you can select demographic filters such as age or preferred language, like Spanish-speaking patients.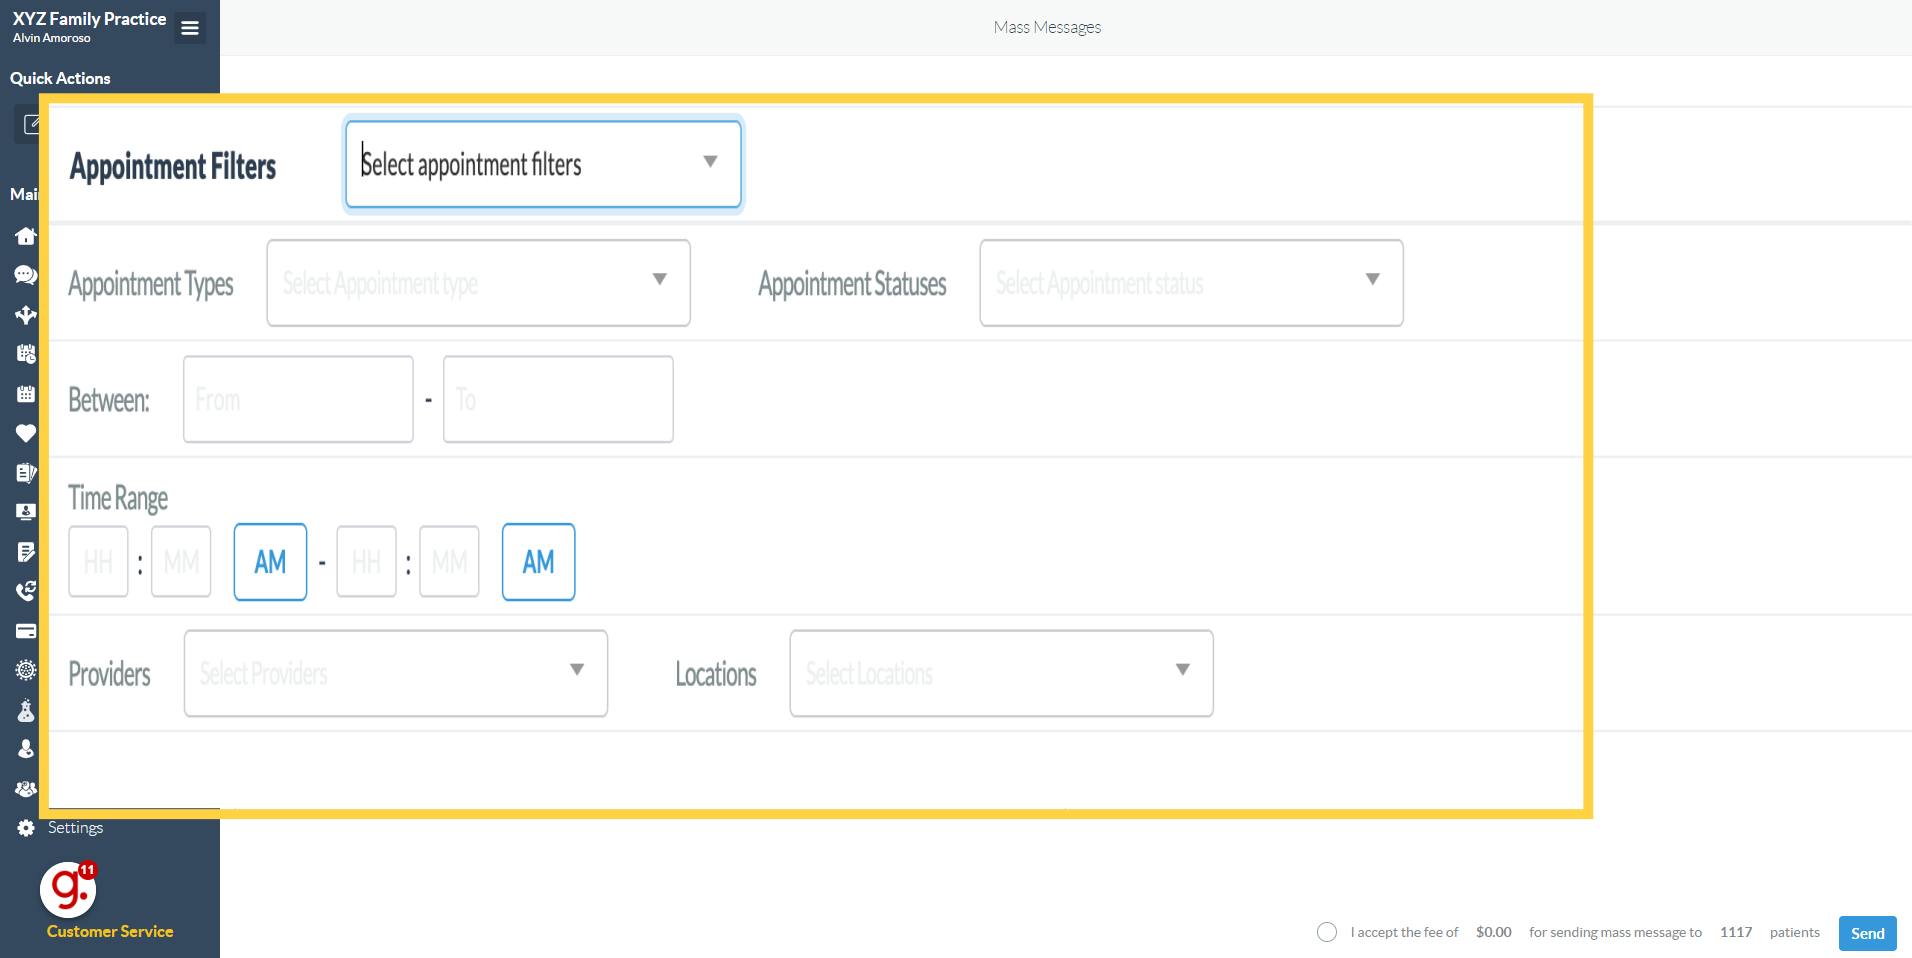
5. Step 2: Content
Next, in Step 2, you will add content. From here, you can formulate your messages. You can also tag them as either marketing or non-marketing messages. Please note that you can always use the variable legend to easily formulate your message.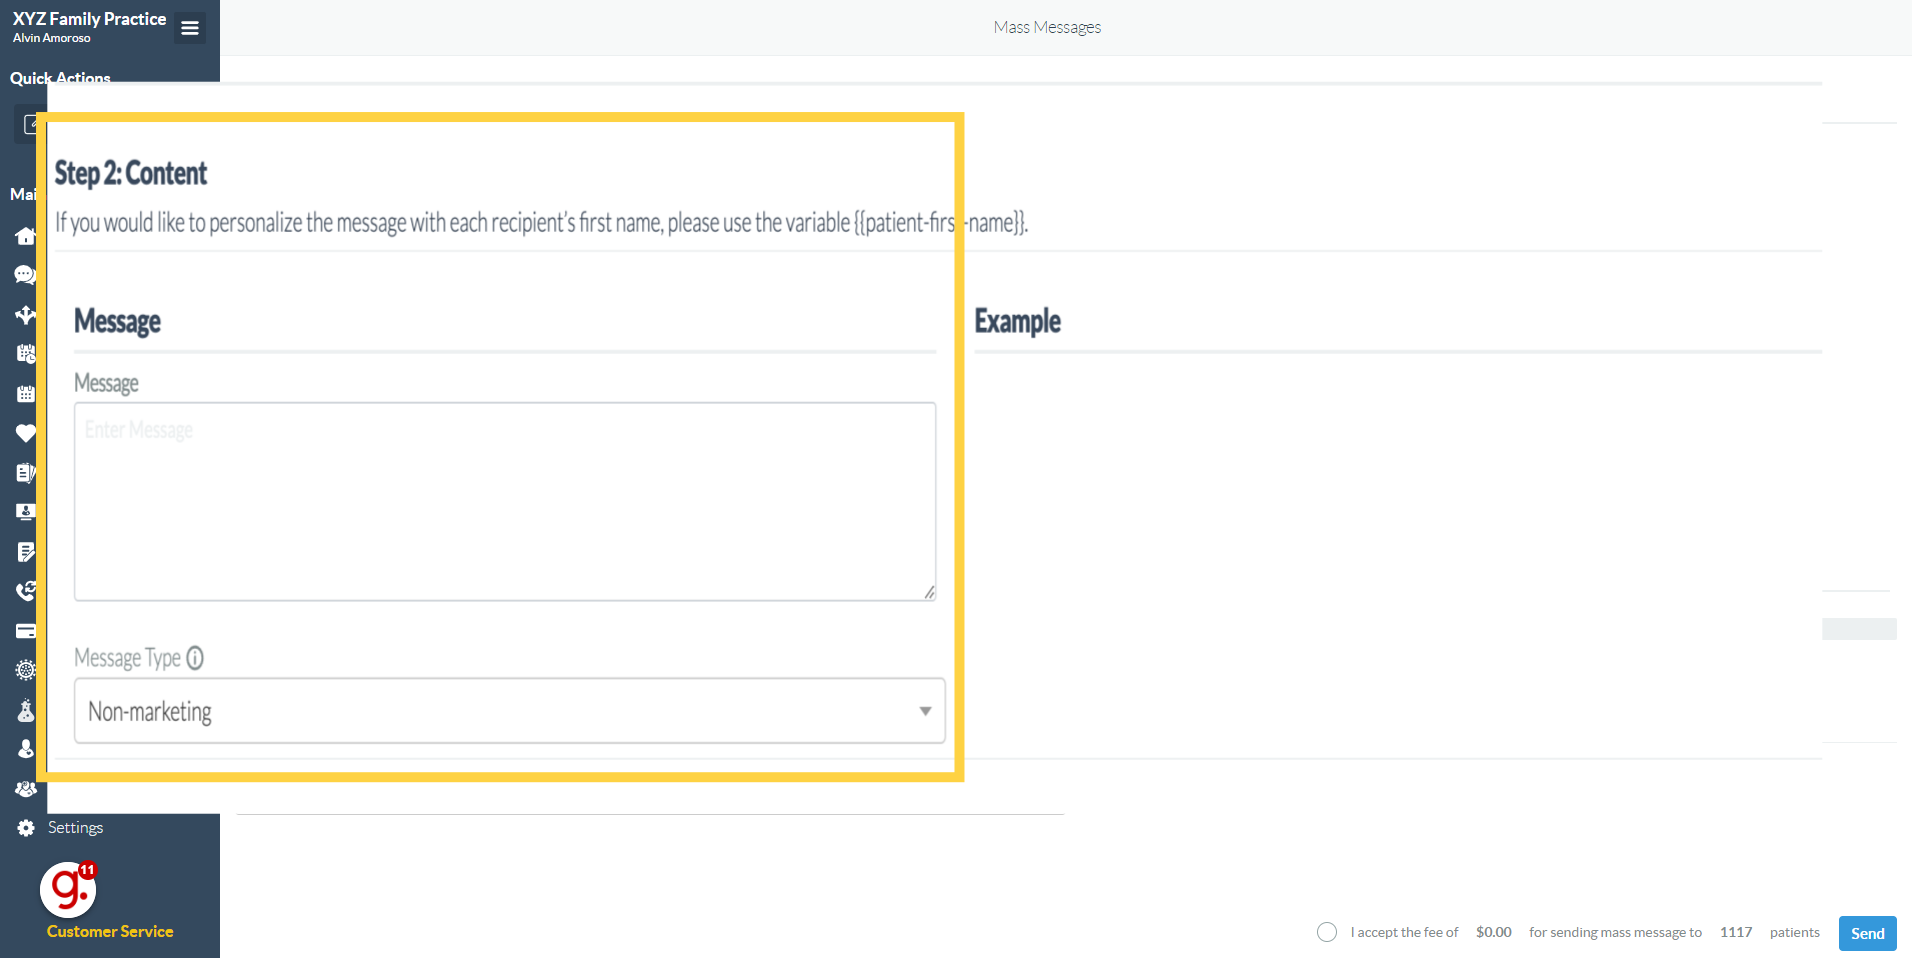
6. Type your message.
Next, in Step 3, which refers to the Billing Description, this new data field simply indicates a reference or name for the mass message you are sending.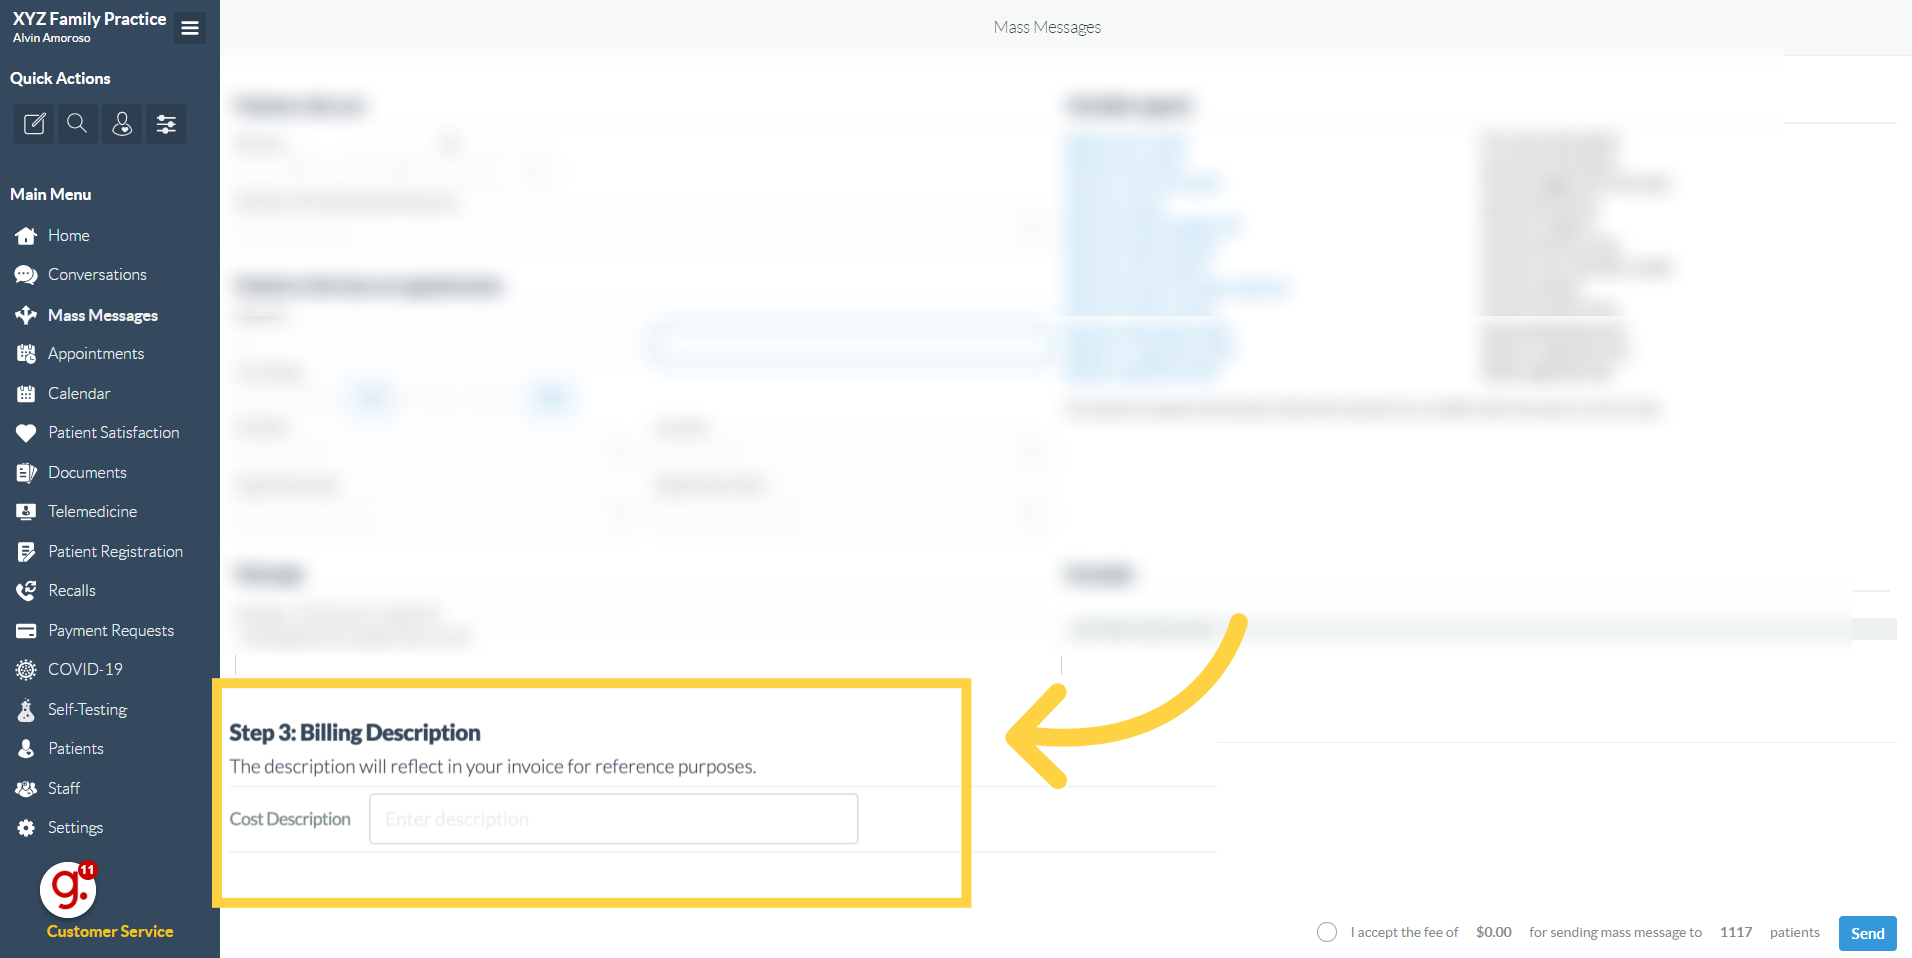
7. Review your recipients
After completing the three steps, you can review the recipients of the mass messages you are creating before sending the mass message. Watch the video for reference.

8. Add a credit card before sending (if you haven't done it yet).
Next, Make sure that you add your credit card before sending the mass messages.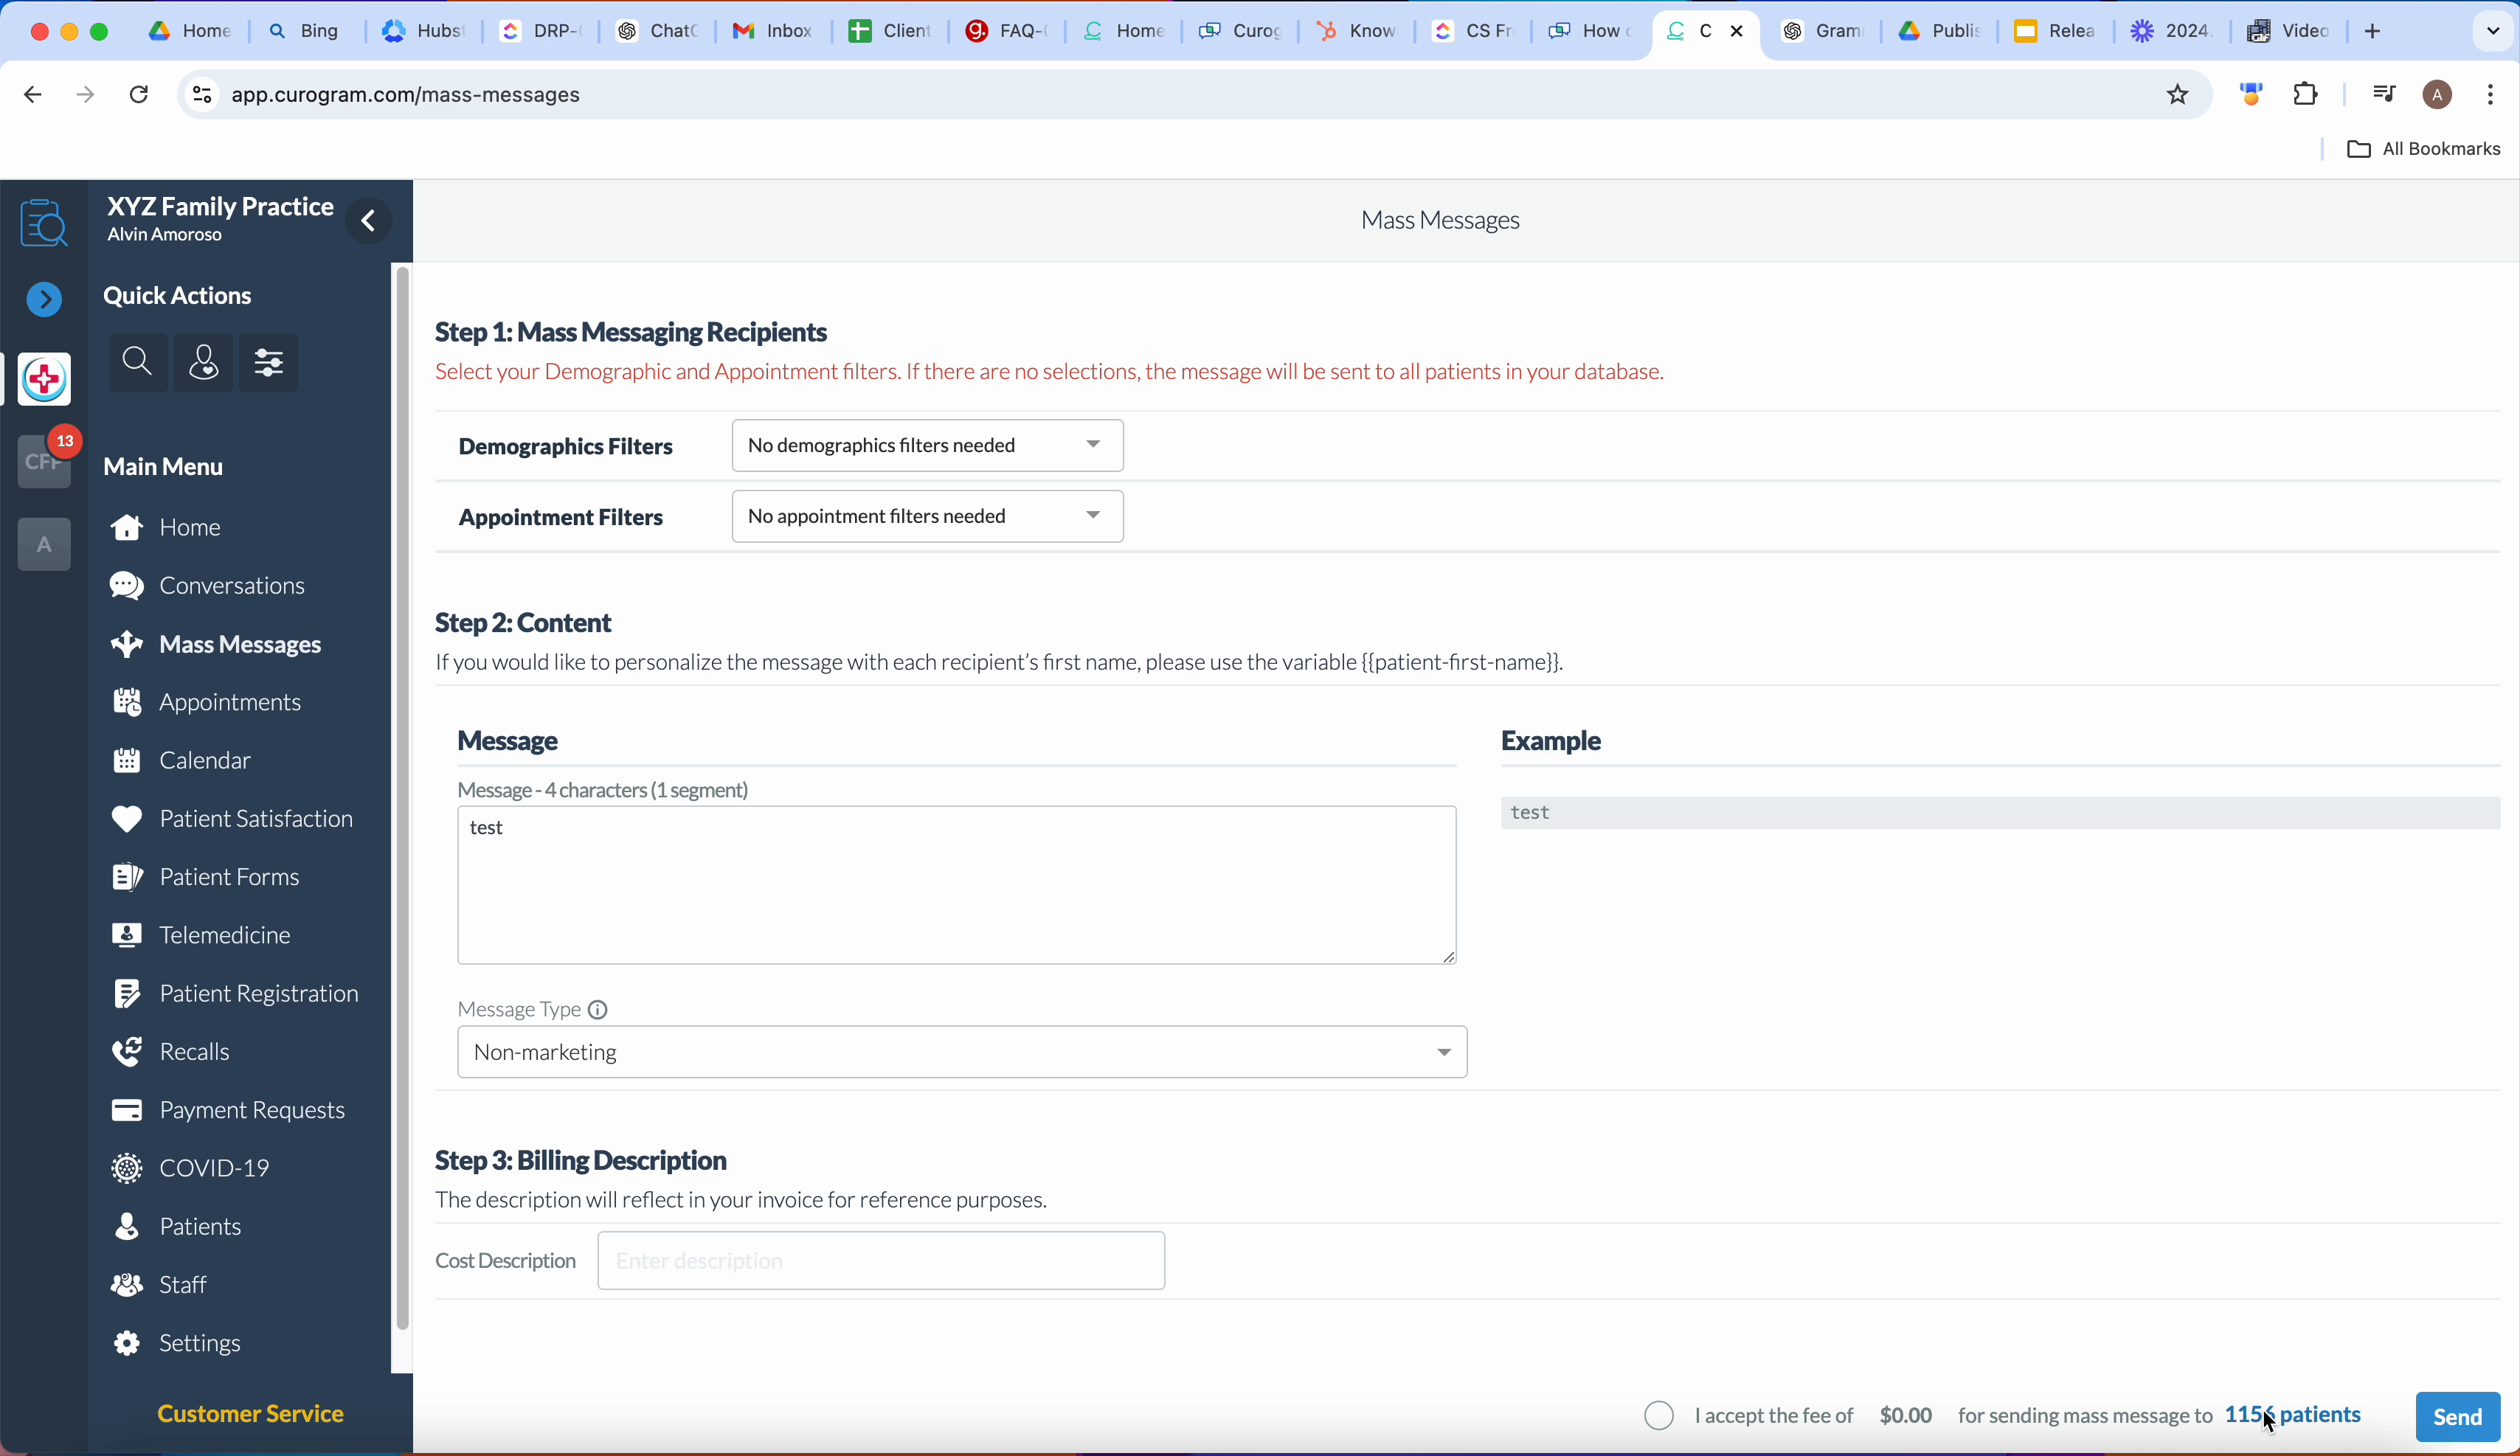
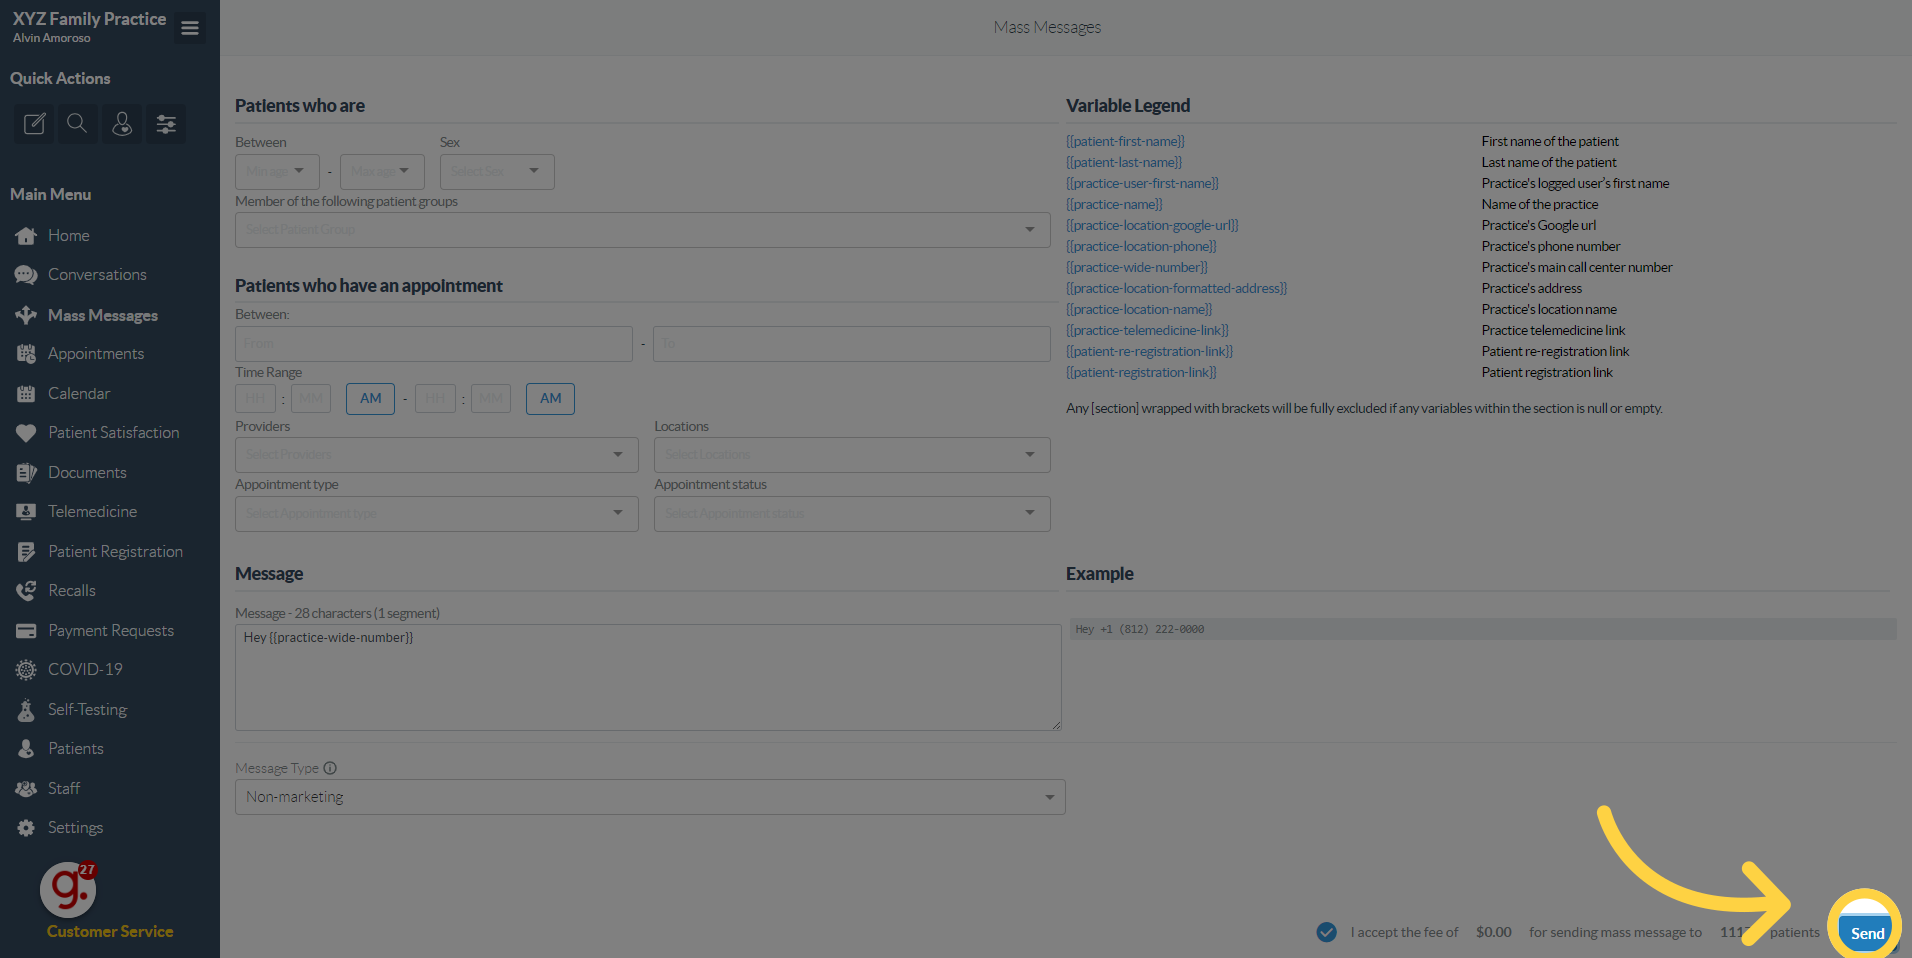
9. Make sure you accept the fees before sending the mass message.
Ensure you accept the fees before dispatching the mass message by clicking the ‘Check’ button.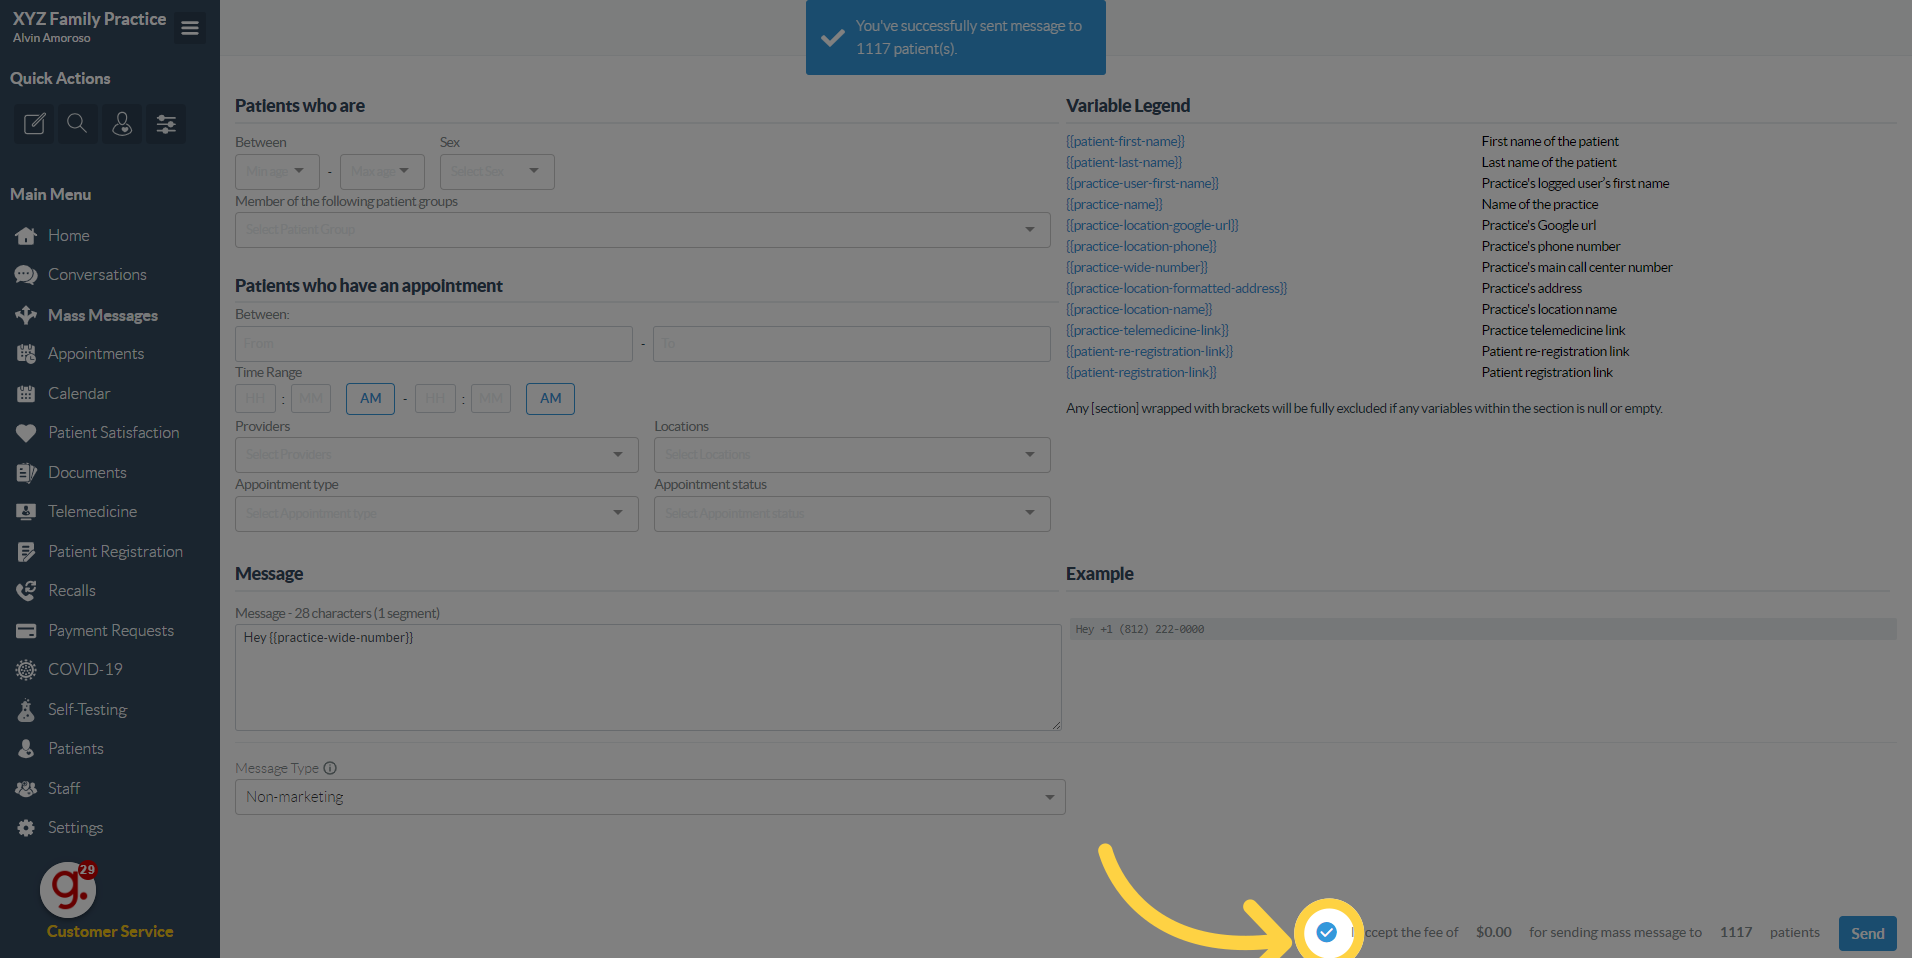
10. Click "Send"
Once everything is set, click the send button to send the mass message.
11. Two-Factor Authentication
You will then be prompted for two-factor authentication before you send the mass message. Please input the OTP that was sent to your email and proceed with sending the mass message.

That's it. You've successfully sent a mass message to your preferred audience.
Updated as of May 11, 2025.