A. Step-by-step instructions
In this guide, we will walk you through the steps on how to add supported language. Make sure that you have admin access to enable this feature.
Go to app.curogram.com
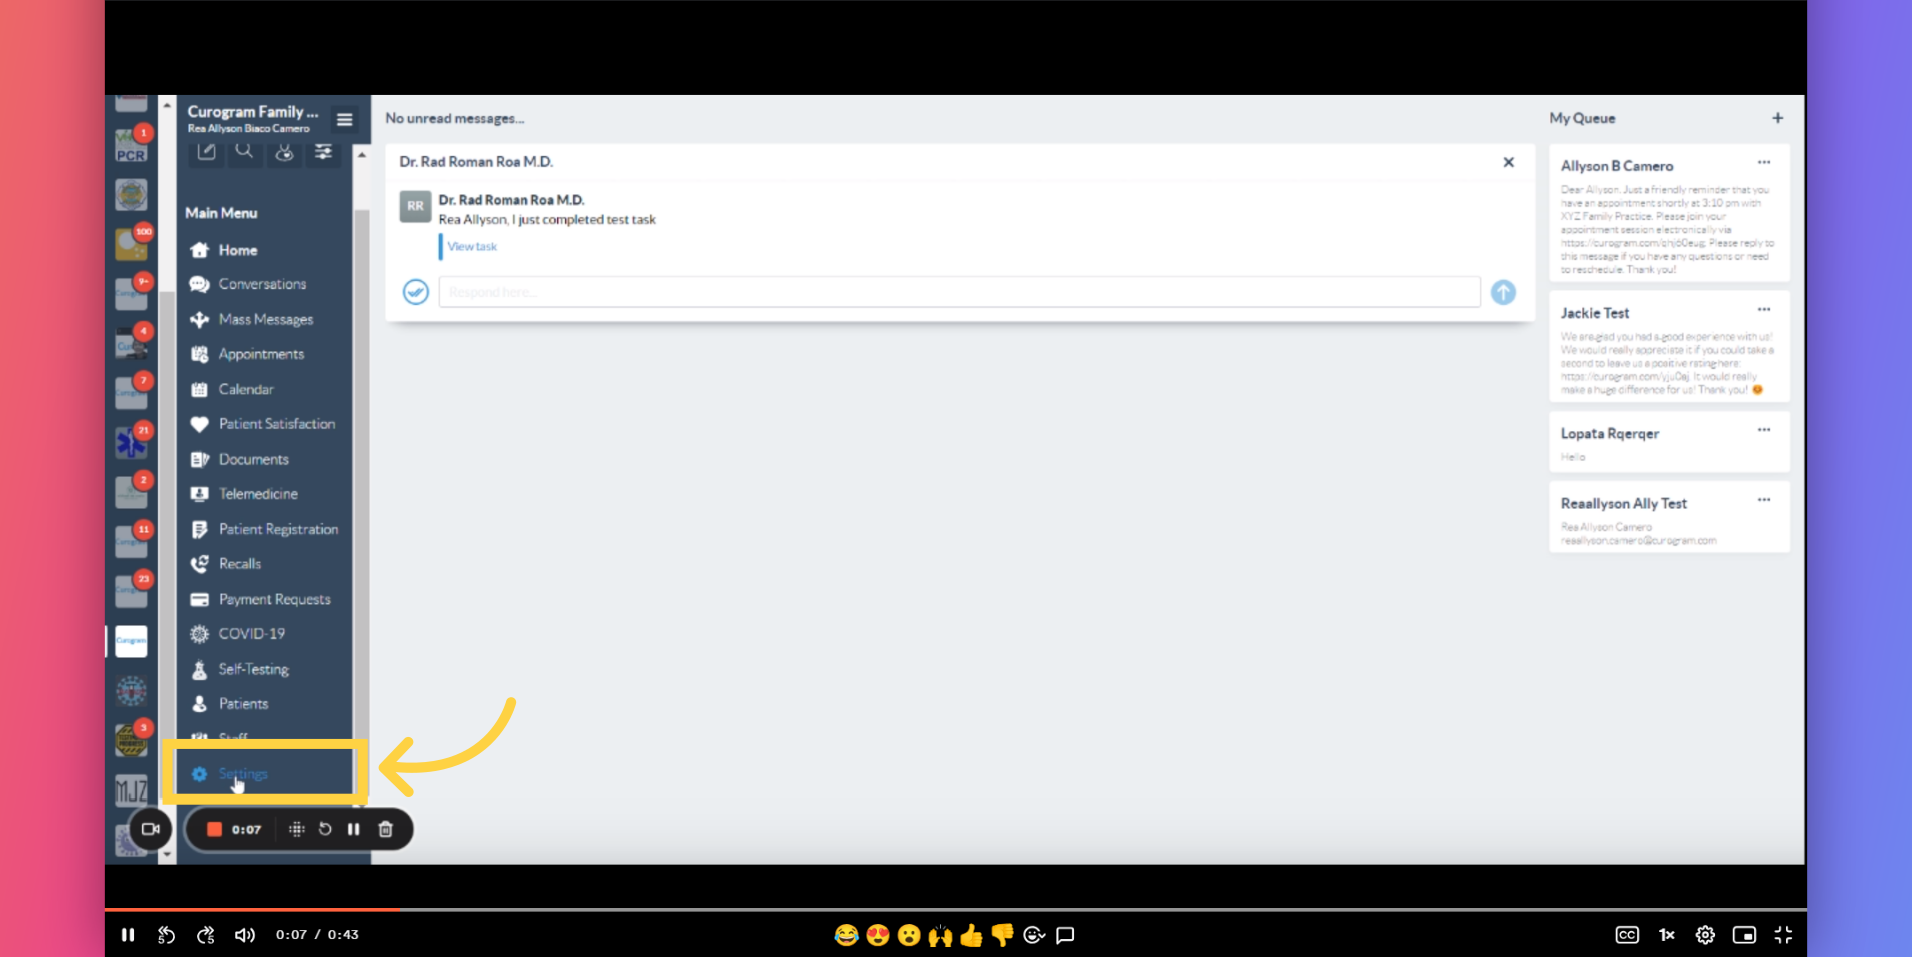
1. Click on "Settings" tab.
On the Curogram App Dashboard, Click on Settings tab
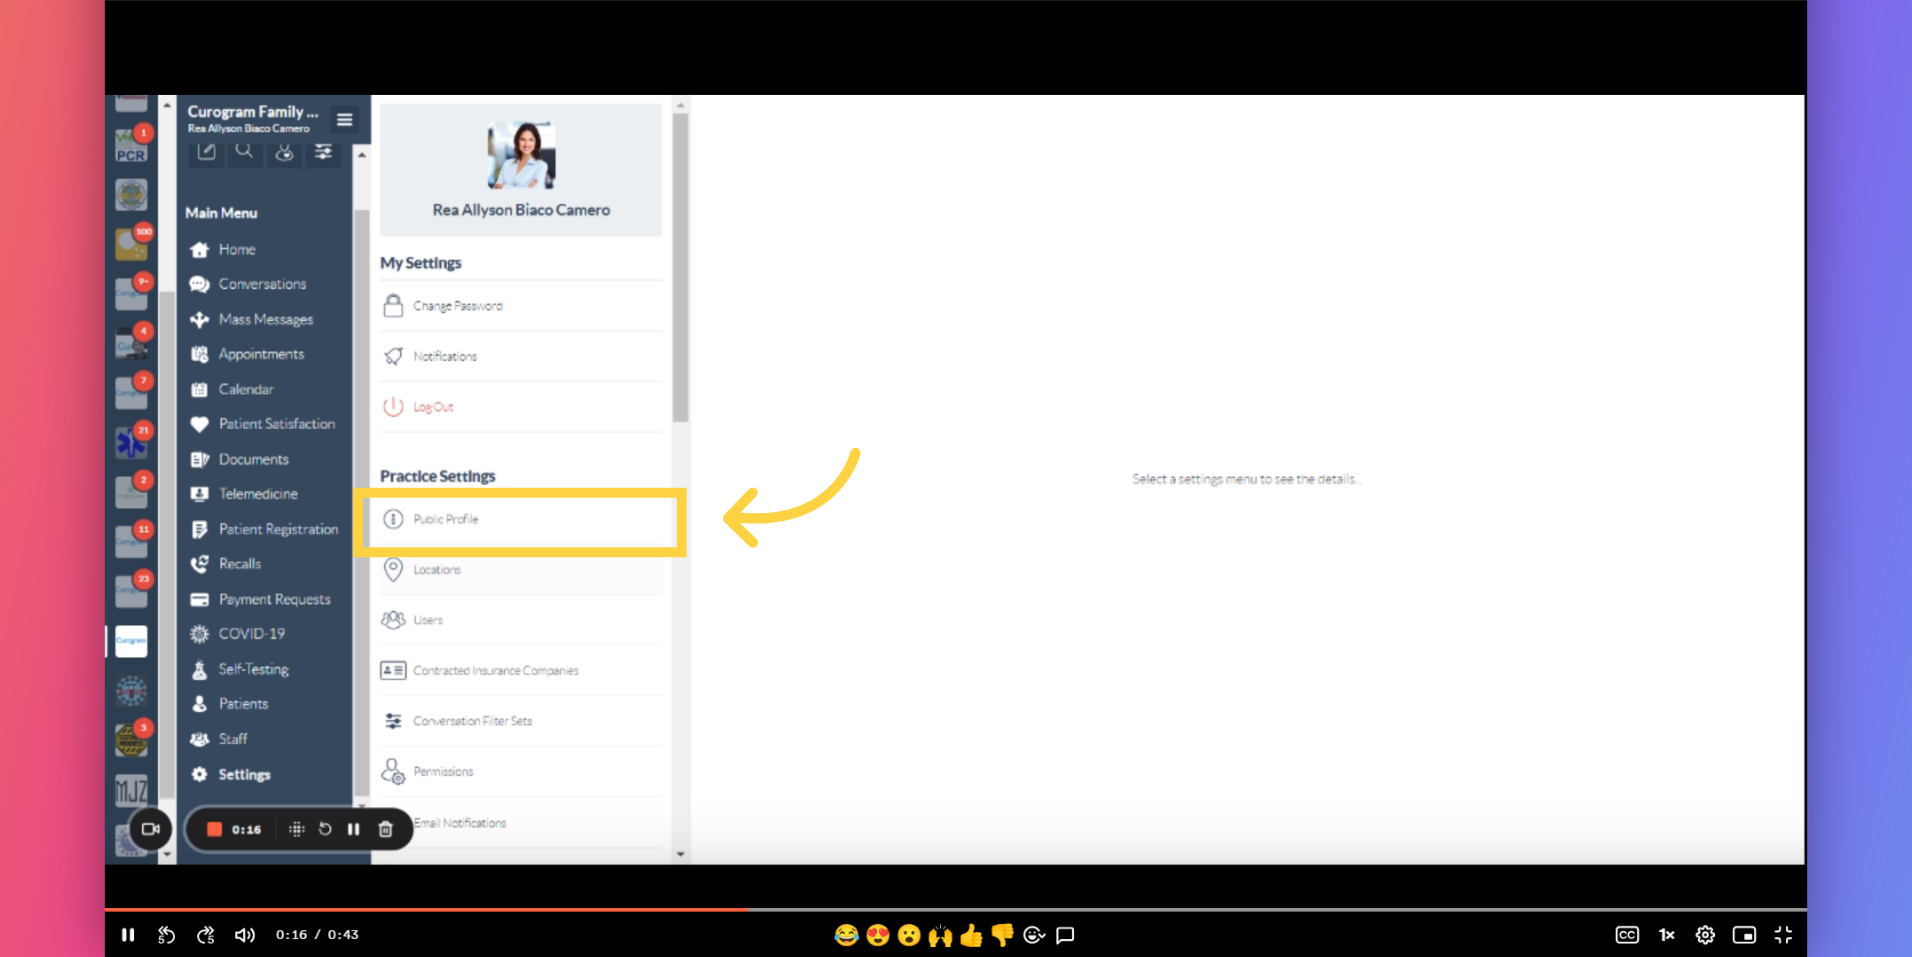
2. Click the "Public Profile" tab.
Once you're on the Settings, click on the Public Profile tab located at the menu.
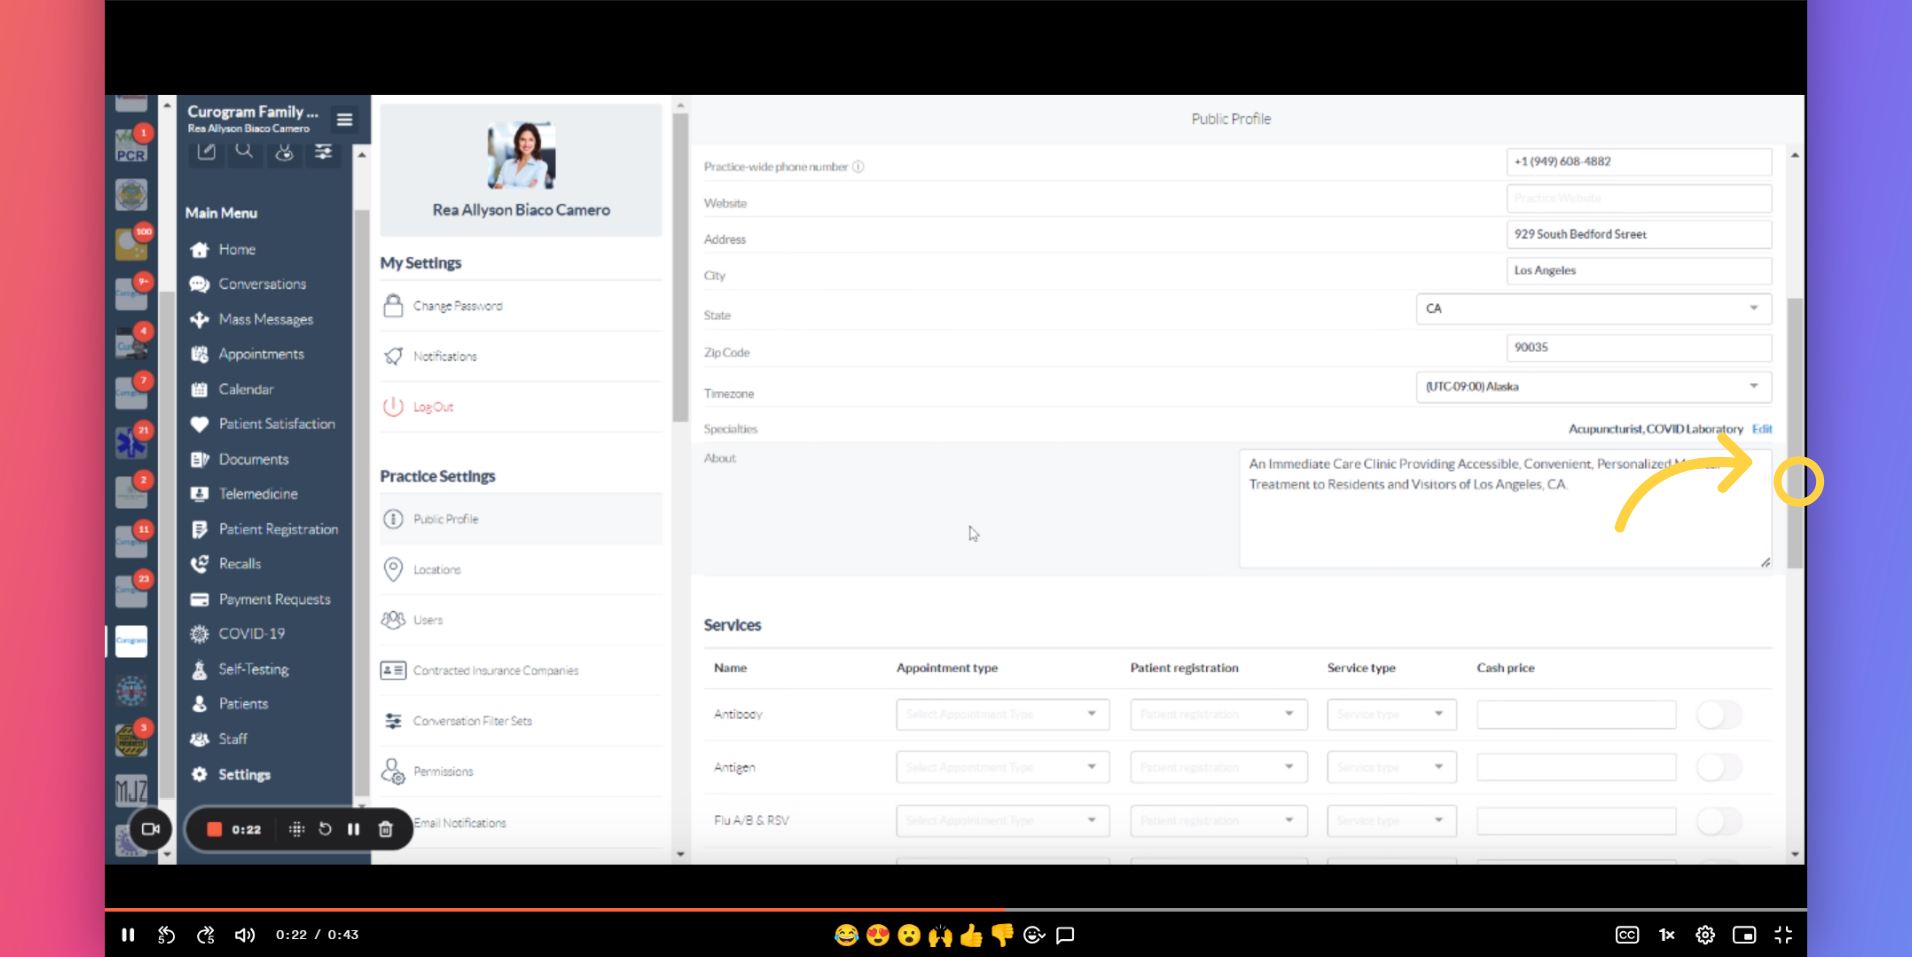
3. Navigate all the way down.
Navigate all the way down until you've reach the bottom.
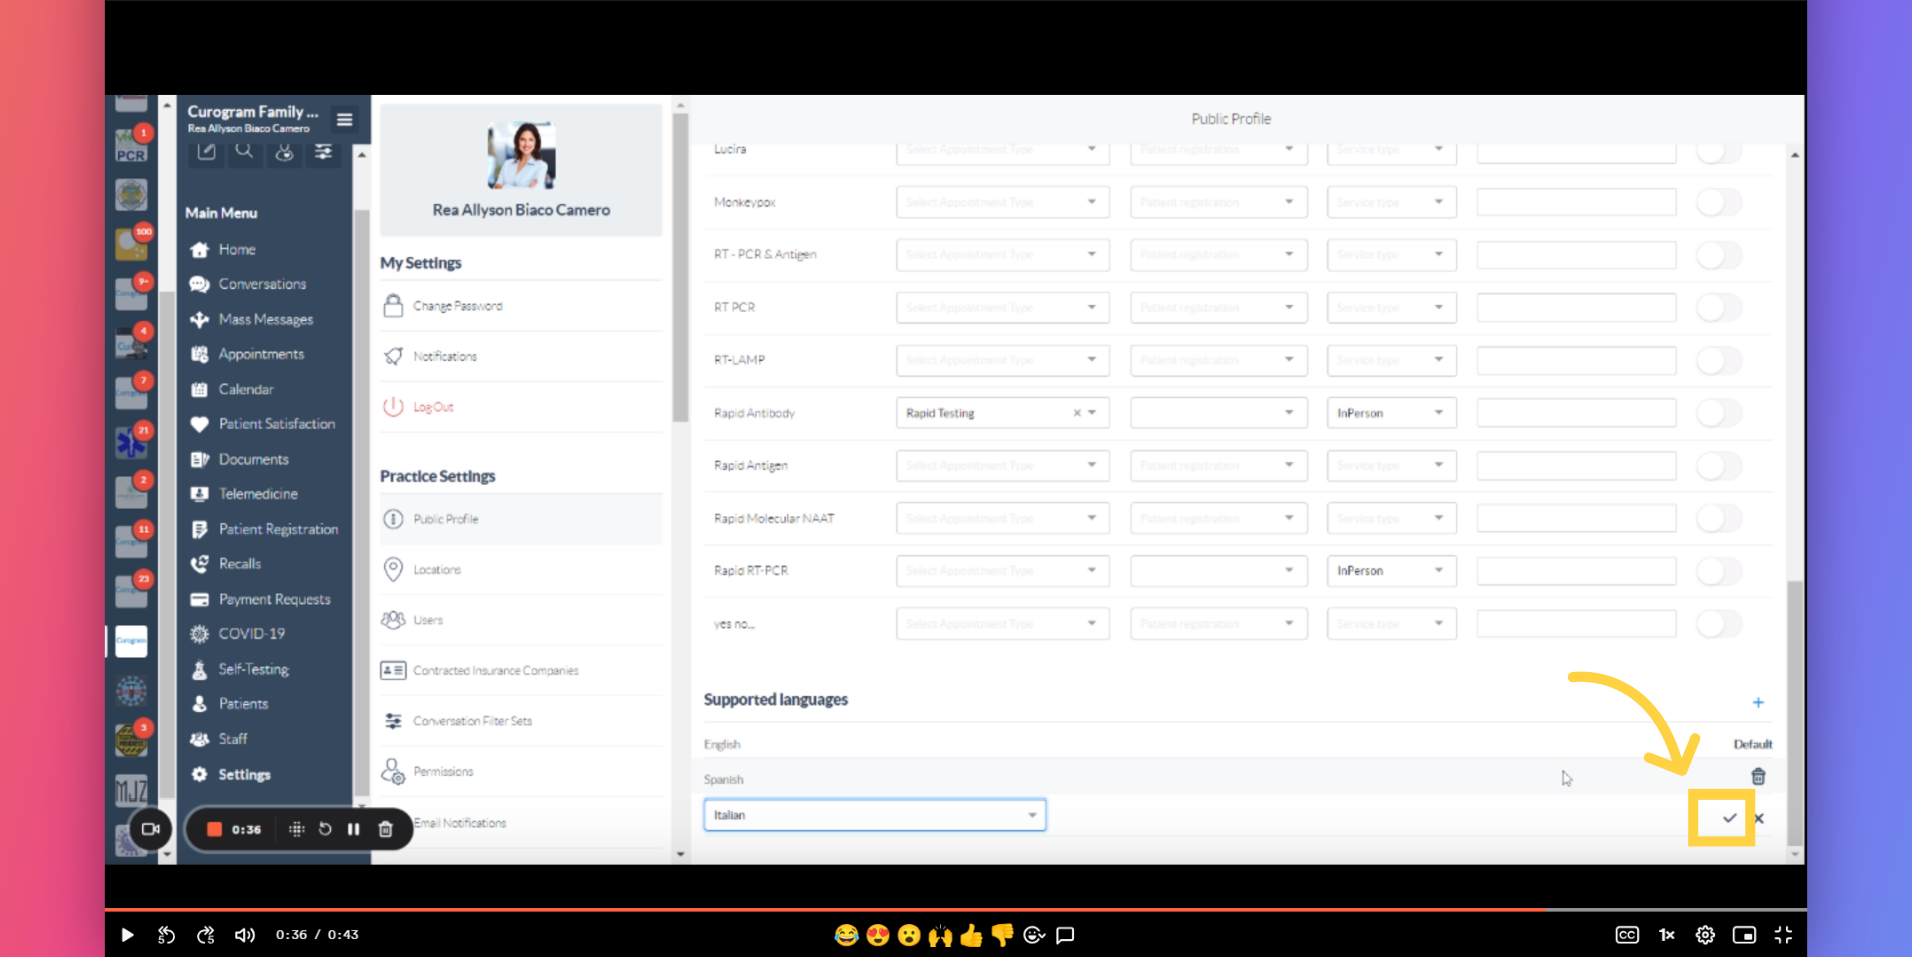
4. Click on the plus sign button.
Once you've reach the bottom, you'll see the "Support language" tab and click the plus sign button located at the opposite side of the tab.
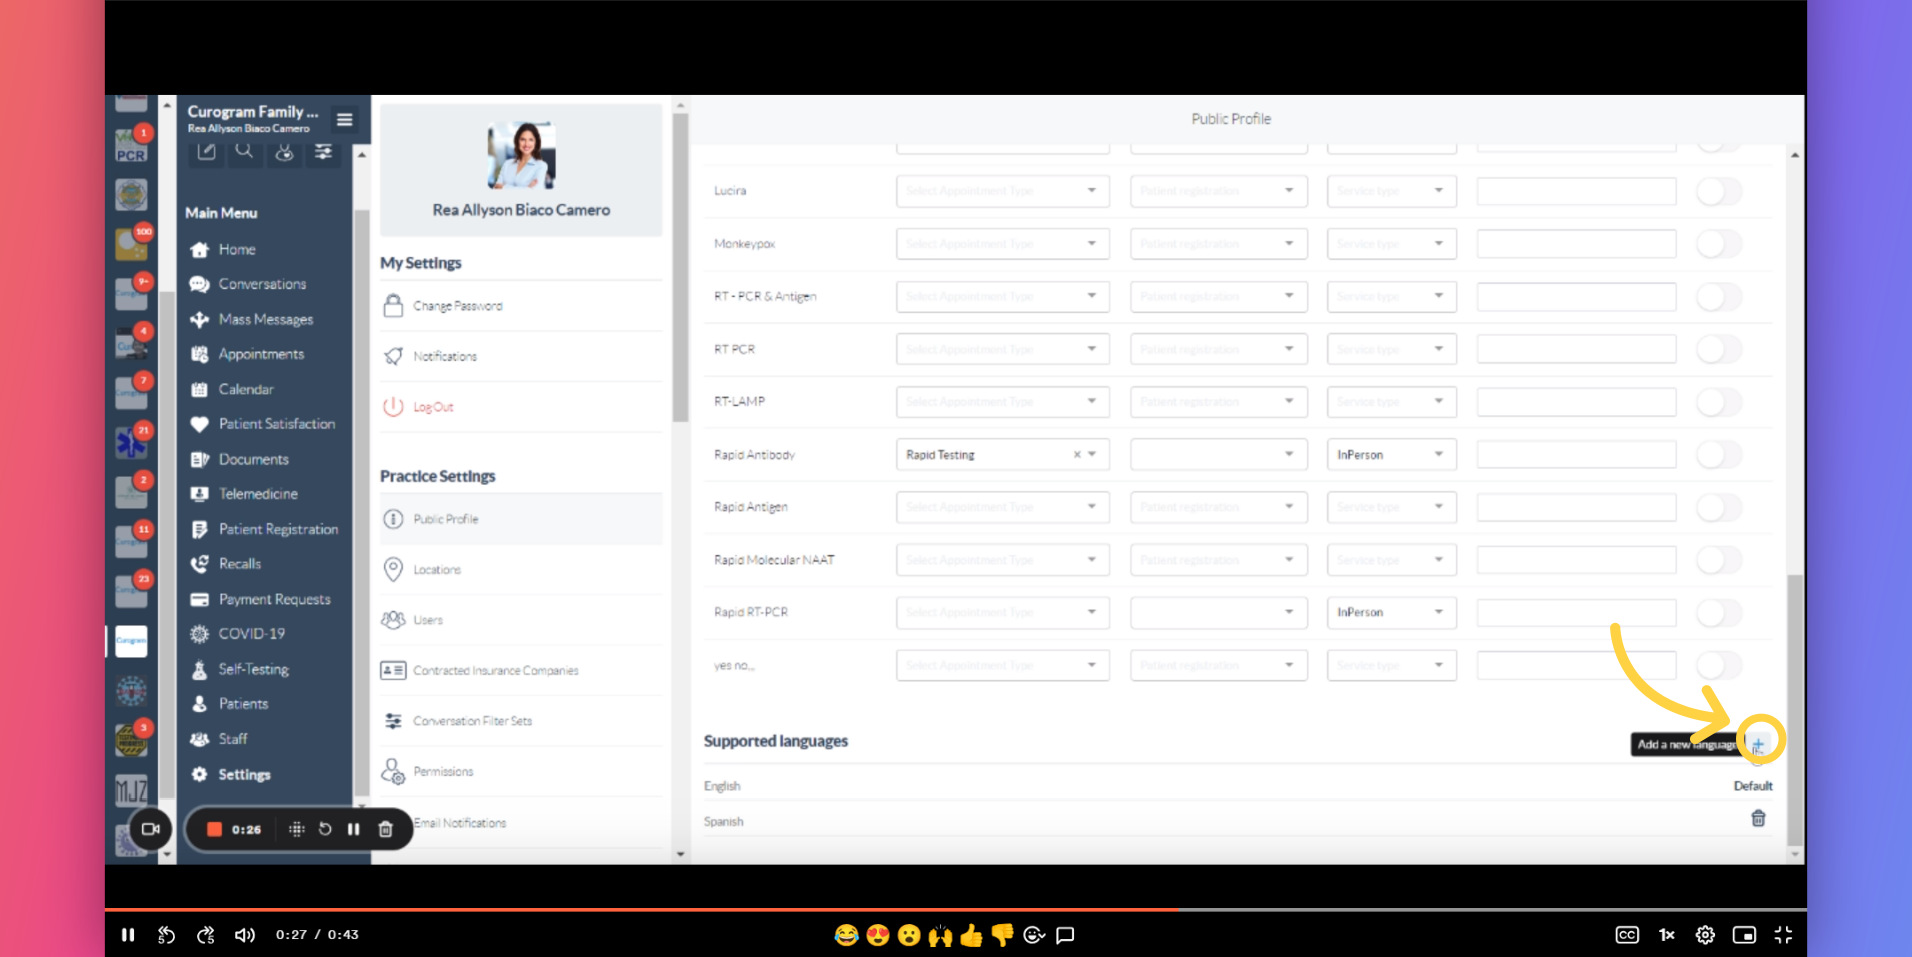
5. You'll see an additional option pop-up.
You'll see an additional option pop-up.
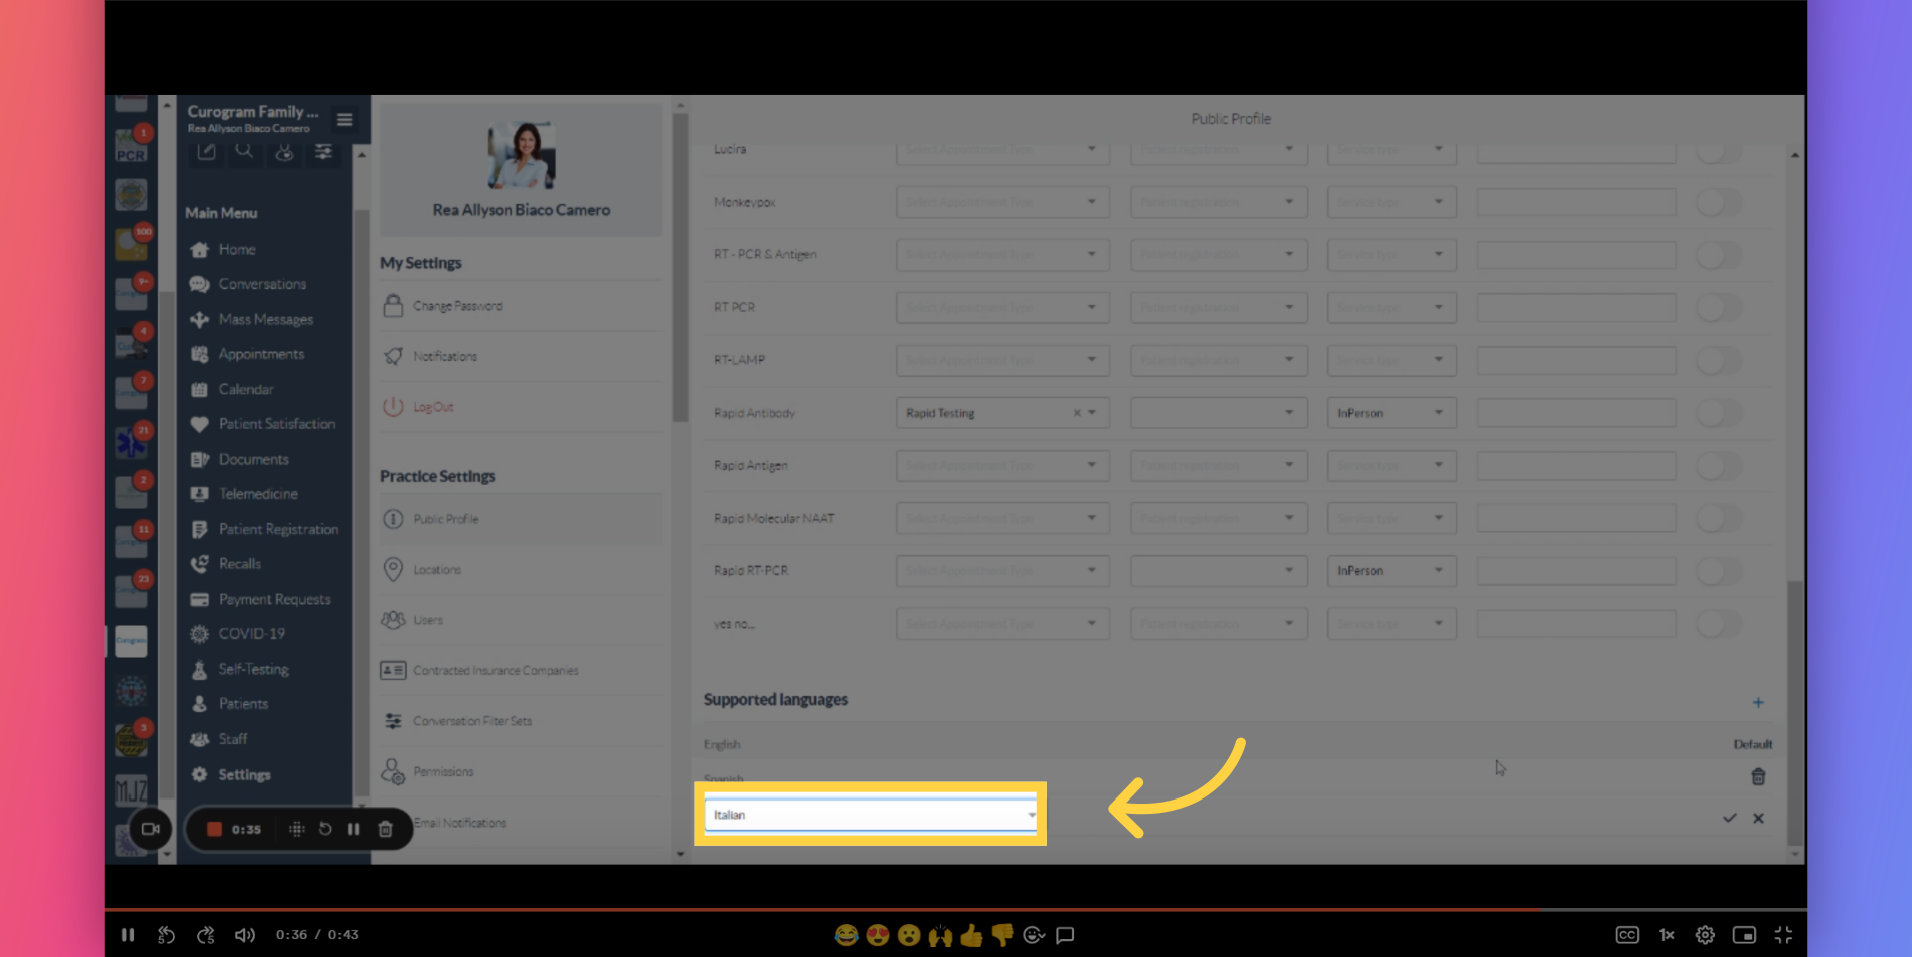
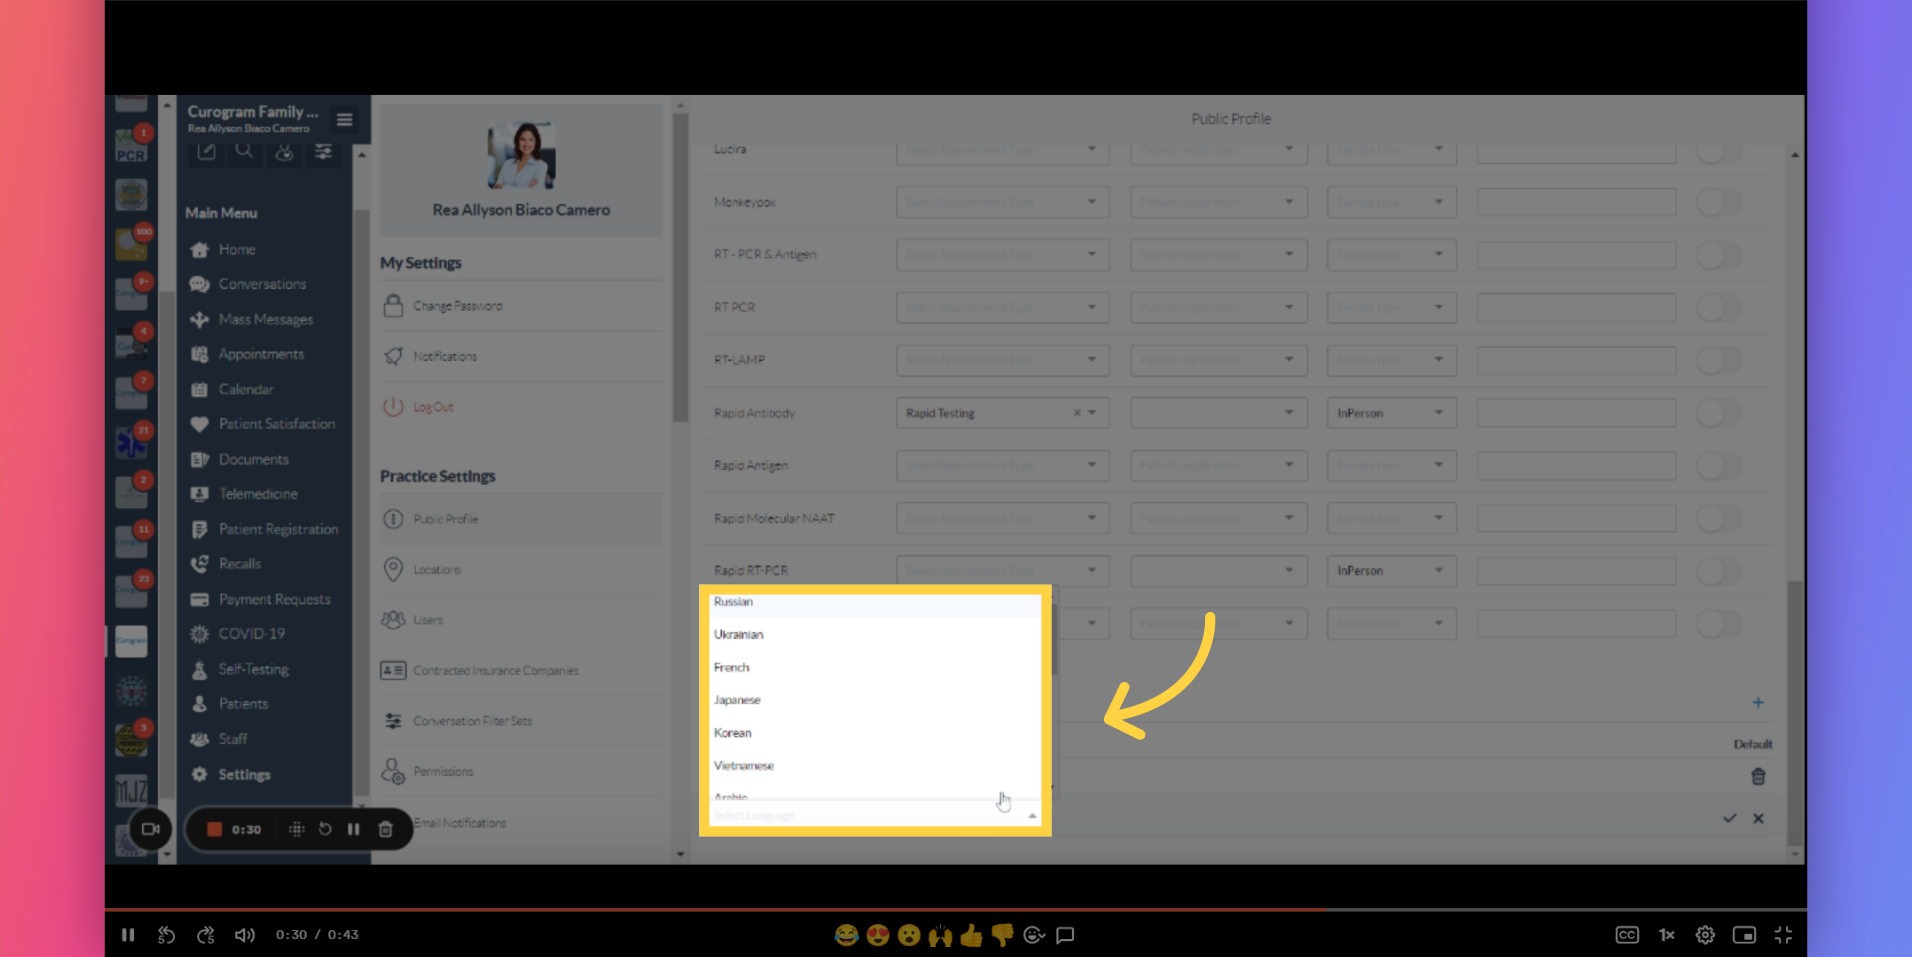
6. Navigate to your preferred language to add.
Navigate to your preferred language to add.
7. Once you've choosen your preferred language, proceed to next step.
Once you've choosen your preferred language, proceed to next step.

8. Click the "check" icon once.
Click the check icon once all done. and That's it. You've successfully added a language.